
Table of Contents
- Understanding 8mm Film Formats
- Professional Scanning vs. DIY Conversion
- How the Digitization Process Works
- Cost to Digitize 8mm Film
- 8mm Film to Digital Converter Machines
- Best File Format for Home Movie Preservation
- Handling Film Damage and Post-Processing
- Long-Term Digital Storage Strategies
Last Updated: August 21, 2026
Understanding 8mm Film Formats
Eight-millimetre film comes in two main variants: Standard 8mm (introduced 1932) and Super 8mm (launched 1965). Super 8mm reduced sprocket holes to provide roughly 40 percent more image area per frame, typically yielding sharper digitization results ([EXTERNAL_LINK: Kodak’s Super 8 history | kodak.com]).
Film stock varies significantly. Kodachrome film, common from the 1950s through 1980s, ages better than Ektachrome or generic colour stocks. Kodachrome tends to fade reddish or purple; Ektachrome fades blue. These differences affect colour accuracy and restoration potential during digitization.
Frame rate is critical. Standard 8mm typically runs at 16 frames per second (fps), while Super 8mm runs at 18 fps ([EXTERNAL_LINK: SMPTE standards for film | smpte.org]). Scanning equipment must detect and match the original frame rate, or playback will be incorrect.
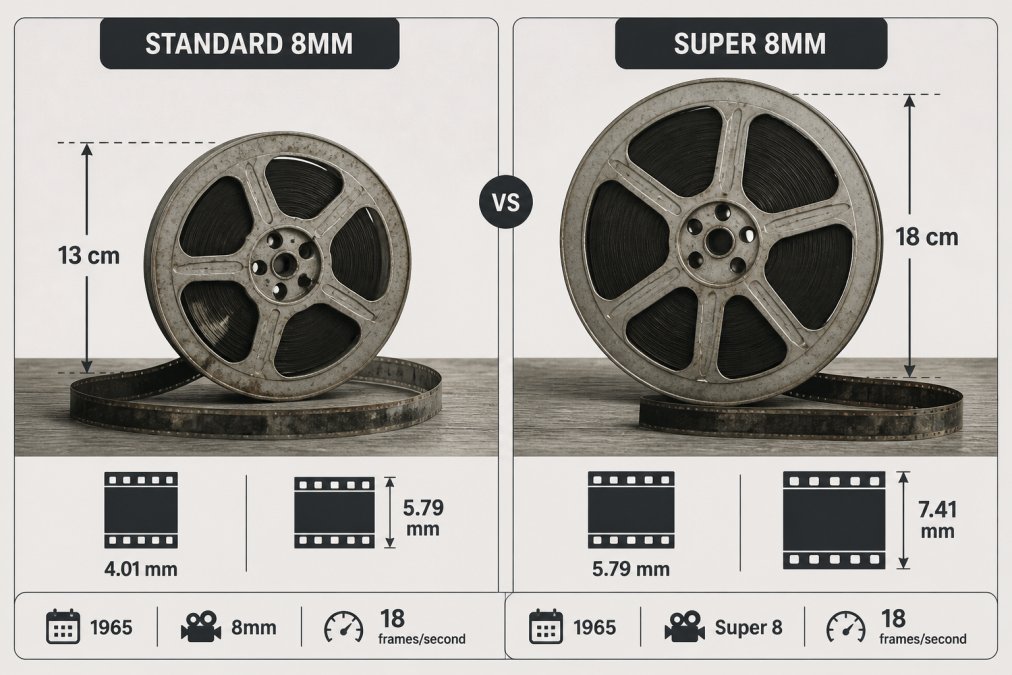
Check the edge markings on your film reels before sending them for digitization. Kodak, Fujifilm, or other manufacturer stamps tell you the film stock and approximate age, helping technicians predict how the film will behave during scanning.
Professional Scanning vs. DIY Conversion
Professional services use purpose-built film scanners costing thousands to tens of thousands of dollars. DIY converters cost considerably less but introduce significant quality trade-offs.
Professional scanning captures frame-by-frame data at full resolution, typically 2K (2048 × 1536 pixels) or 4K (4096 × 2160 pixels) ([EXTERNAL_LINK: Peer-reviewed research on film digitization | pmc.ncbi.nlm.nih.gov]). Each frame is individually registered, colour-corrected, and stabilized. A 30-metre reel takes roughly 30 to 60 minutes to scan professionally. DIY converters complete the same reel in 15 to 25 minutes but capture significantly less detail and introduce optical distortion.
Image stabilization represents a major quality difference. Professional frame-by-frame scanning detects and compensates for film weave, the natural wobbling from old camera mechanisms. DIY converters cannot stabilize effectively because they capture projected images rather than analysing individual frames.
Colour accuracy also diverges sharply. Professional services use spectral analysis to identify original colour casts in degraded film stock, then apply targeted corrections. DIY converters apply generic colour curves that miss the nuance of heavily degraded stocks.
Professional scanning delivers archival-quality files suitable for long-term preservation and family sharing. DIY conversion is faster and cheaper but produces files that degrade noticeably on large screens.
The Digitization Process
Professional digitization follows a consistent workflow: inspection, cleaning, scanning, stabilization, colour correction, and delivery.
Inspection begins before scanning. Technicians examine reels for physical damage, brittleness, vinegar syndrome (chemical degradation with an acidic smell), mold, or sprocket damage. Vinegar syndrome can be halted but not reversed; if your film smells like vinegar, digitization should happen soon because degradation accelerates once it starts.
Cleaning removes decades of dust, debris, and oxidation. Professional services use ultrasonic cleaning or gentle chemical baths designed specifically for film. Improper cleaning can damage fragile stock.
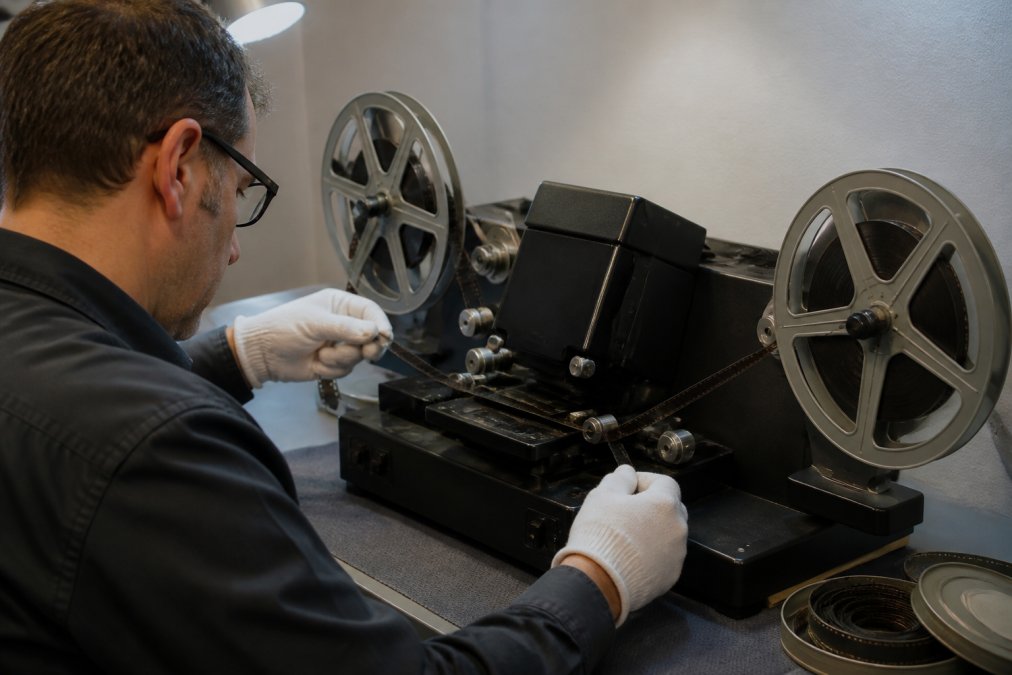
Scanning captures each frame using a high-resolution digital sensor. Frame-by-frame scanning allows the scanner to optimise exposure and colour for each individual frame.
Image stabilisation runs during or after scanning. Software detects micro-movements and weave, then applies optical flow analysis to reduce jitter. Stabilising 4K video is computationally intensive and can take hours.
Colour correction follows stabilisation. Technicians analyse your film stock’s colour profile, identify colour casts caused by age or degradation, and apply targeted corrections through frame-by-frame analysis.
Avoid services that promise “one-click restoration” for all film. Every reel ages differently depending on storage conditions, film stock, and original exposure. Proper restoration requires manual review and individual frame adjustment.
Delivery format varies by service. Most professional operations provide files in MP4 or MOV format at HD (1920 × 1080 pixels) or 4K resolution. Some also offer ProRes for editing. Showbiz Video Productions delivers files in multiple formats to ensure compatibility with your devices and editing software.
Cost to Digitize 8mm Film
Pricing depends on several factors: film format (Standard 8mm versus Super 8mm), resolution (HD versus 4K), restoration level (basic scan versus frame-by-frame colour correction), and volume. Services typically charge per reel, per metre of film, or per hour of finished video.
Basic scanning captures film as-is without colour correction or frame-by-frame stabilisation. Full restoration, including colour grading, dust removal, and advanced stabilisation, costs significantly more.
Resolution choice affects cost. HD scanning is faster and cheaper than 4K. If your original film is heavily degraded or shot on lower-quality stock, the quality difference between HD and 4K may be imperceptible.
Volume discounts are common. Services digitising hundreds of reels annually typically offer lower per-reel rates. Same-day or next-day service commands a premium; standard turnaround (5 to 10 business days) is cheaper.
Families with 5 to 20 reels of mixed condition film benefit most from professional services. The per-reel cost is reasonable, turnaround is fast, and you avoid managing multiple file formats and backup strategies yourself.
For current pricing specific to your situation, contact Showbiz Video Productions directly for a quote. The team can assess your reels and provide transparent pricing based on what your specific collection requires.
8mm Film to Digital Converter Machines
Consumer-grade 8mm film to digital converter machines occupy a middle ground between full professional scanning and manual frame-capture methods. These devices use motorised film advance coupled to a digital camera or sensor that captures projected or reflected images.
Entry-level devices (under AUD $500) capture at 1080p with noticeable optical distortion. Mid-range converters (AUD $500 to AUD $1500) perform better with improved optics and higher resolution. High-end consumer devices (AUD $1500 to AUD $3000) approach semi-professional quality but still cannot match dedicated frame-by-frame scanning.
Stabilisation on consumer converters is limited to basic software smoothing, which reduces jitter but cannot correct film weave or sprocket damage. Colour accuracy is weak; consumer converters apply generic colour profiles and cannot identify stock-specific colour casts.
Consumer converters work best for casual digitization of film in good condition. For heavily degraded, moldy, or valuable footage, professional scanning is safer.
Best File Format for Home Movie Preservation
Choosing the right file format affects long-term accessibility, editing capability, and storage requirements.
MP4 is the most practical choice for preservation and sharing. It compresses video efficiently without visible quality loss for home movie content and plays on virtually every device without specialised software. Compatibility ensures your files remain playable on future devices.
MOV format (Apple’s QuickTime container) offers similar compatibility and is widely supported. If you’re in an Apple ecosystem, MOV is a natural choice.
ProRes is a professional editing format that preserves maximum image quality and allows frame-accurate editing without re-encoding. If you plan to edit your footage, ProRes is worth the extra storage space. However, ProRes files are 5 to 10 times larger than MP4. For long-term archival without editing, ProRes is impractical.
Codec choice matters. MP4 can use H.264 or H.265 (HEVC) compression. H.265 produces smaller files at the same quality but is newer and less universally supported. H.264 is the safer choice for long-term compatibility.
Frame rate in the output file should match the original film’s frame rate. Standard 8mm at 16 fps should be digitized at 16 fps, not converted to 24 fps or 30 fps. Conversion introduces interpolation artefacts that make motion appear unnatural.
Store your digitized files in at least two locations: one local (USB drive or external hard drive at home) and one remote (cloud storage or offsite backup). Redundancy ensures your memories survive hardware failure or data centre incidents.
Resolution output (HD versus 4K) affects file size and future-proofing. 4K files are roughly 4 times larger than HD for the same duration. If your original film was scanned at 4K, downsampling to HD loses information. Most home movies don’t contain enough fine detail to justify 4K, but extra storage is cheap insurance.
Handling Film Damage and Post-Processing
Aged 8mm film accumulates damage over decades. Understanding repairable damage helps set realistic expectations.
Sprocket damage (torn or cracked perforations) is common in heavily used reels. Minor damage can usually be compensated by professional scanners. Severe damage may prevent scanning altogether.
Brittleness indicates advanced chemical degradation. Film becomes brittle as the acetate breaks down. Handling brittle film risks shattering. Digitization should happen soon because degradation accelerates.
Vinegar syndrome occurs when the acetate base hydrolyses, releasing acetic acid. The film becomes sticky, discoloured, and eventually unplayable. Digitization should be prioritised because the film itself is deteriorating.
Mold and fungal growth appear as spots or hazy patches. Mild surface mold can sometimes be gently cleaned. Deep mold causes permanent damage. Professional cleaning before scanning is essential.
Colour fading happens to all colour film stocks at different rates. Fading is permanent, but post-processing can partially compensate by identifying the colour cast and shifting the image toward what the original likely looked like.
Post-processing includes colour correction, contrast adjustment, dust removal, and frame stabilisation. Dust removal detects and eliminates small spots caused by particles on the film. Temporal noise reduction reduces grain without blurring fine details.
Avoid over-processing. Aggressive noise reduction can remove fine details and make footage look artificially smooth. Professional services balance restoration against preservation of the original character.
Long-Term Digital Storage Strategies
Digitizing your 8mm film is only half the preservation challenge. Your digital files must survive hardware failure, format obsolescence, and data loss.
The 3-2-1 backup rule is the industry standard: maintain three copies of your files, on two different types of storage media, with at least one copy stored offsite. For digitized home movies, this might mean one copy on an external hard drive at home, one copy on a second external hard drive at a family member’s house, and one copy in cloud storage.
Hard drive reliability matters. Consumer-grade external drives typically last 3 to 5 years before failure becomes likely. Plan to replace backup drives every 3 to 4 years, refreshing your backups in the process.
Cloud storage provides offsite backup and reduces reliance on physical hardware you must maintain. Services like Google Drive, Dropbox, OneDrive, or iCloud offer affordable plans (AUD $5 to AUD $15 monthly) with enough storage for hundreds of hours of video.
File format stability affects long-term accessibility. MP4 video in H.264 codec is widely supported today and likely to remain supported for decades as an industry standard.
Metadata preservation ensures your files remain meaningful. Include creation dates, film stock information, and descriptions in file metadata. Simple naming like "Grandma’s Birthday 1978" rather than "Film_Reel_03" preserves context.
Regular verification prevents silent data loss. Once per year, open a sample of your archived files and play them through to confirm your backup strategy is working.
Digitizing your 8mm film to digital files preserves irreplaceable family memories and makes them accessible on modern devices. Whether you choose professional scanning or a consumer converter depends on your film’s condition, budget, and time investment. For families with valuable or heavily degraded footage, professional digitization like the frame-by-frame scanning and restoration offered by Showbiz Video Productions delivers archival-quality results that justify the investment. The team’s 20+ years of experience, professional-grade equipment, and commitment to handling precious media with care ensure your memories are preserved accurately and safely. Get a quote from Showbiz Video Productions to see how affordable professional digitization can be.
| Method | Cost Range | Time Investment | Quality | Best For |
|---|---|---|---|---|
| Professional scanning | Moderate to high | Minimal (service handles it) | Archival quality | Valuable or degraded film |
| Consumer converter | Low to moderate | Significant (DIY) | Good to acceptable | Casual digitization, good condition film |
| Frame-by-frame restoration | High | Minimal | Exceptional | Rare or historically significant footage |
Frequently Asked Questions
Can I digitize 8mm film at home?
Yes, you can digitize 8mm film at home using a dedicated converter machine, though results depend on equipment quality and your technical skill. Entry-level converters are affordable but may produce lower resolution output. For irreplaceable family films, professional digitization often delivers superior image quality, frame-by-frame scanning, and restoration capabilities. Home conversion works well for less critical material or as a budget option.
What is the best file format for home movie preservation?
MP4 is the most practical format for home movie preservation because it balances file size, compatibility, and quality across modern devices. For archival purposes, consider storing a master copy in a lossless format like ProRes or DNxHD, then create MP4 versions for everyday access. Always maintain backups on multiple storage media, including external hard drives and cloud storage, to protect against data loss over time.
What is the difference between 8mm and Super 8 film?
Standard 8mm film, introduced in 1932, has smaller frame dimensions and lower image quality than Super 8. Super 8, released in 1965, uses a larger frame area within the same cartridge width, delivering sharper, brighter images with better colour reproduction. Super 8 film is also easier to digitize because it has fewer splices and more stable frame registration. Identifying your format is crucial before digitization, as both require different scanning equipment.
How much does it cost to digitize 8mm film?
Cost varies significantly based on method and volume. Professional digitization services typically charge per reel or by running time, with pricing depending on film condition, resolution requirements, and turnaround speed. DIY converters range from budget options to premium equipment costing several hundred dollars, plus your time investment. Contact a professional service for a transparent quote tailored to your specific collection and requirements.
This article was written using GrandRanker