
Table of Contents
- The Core Challenge of Mixed Media Digitization
- Digitize Mixed Media the Right Way: A Step-by-Step Framework
- How to Digitise Old VHS Tapes and Film Reels at Home
- Mobile Scanning vs. Flatbed Hardware for Textured Work
- Batch Processing Workflows for Large Collections
- The Cost of Digitising Media Collections: DIY vs. Professional Media Conversion Services
- Conclusion: Preserve Your Originals and Archive Your Files
- Frequently Asked Questions
Last Updated: September 9, 2026
The Core Challenge of Mixed Media Digitization
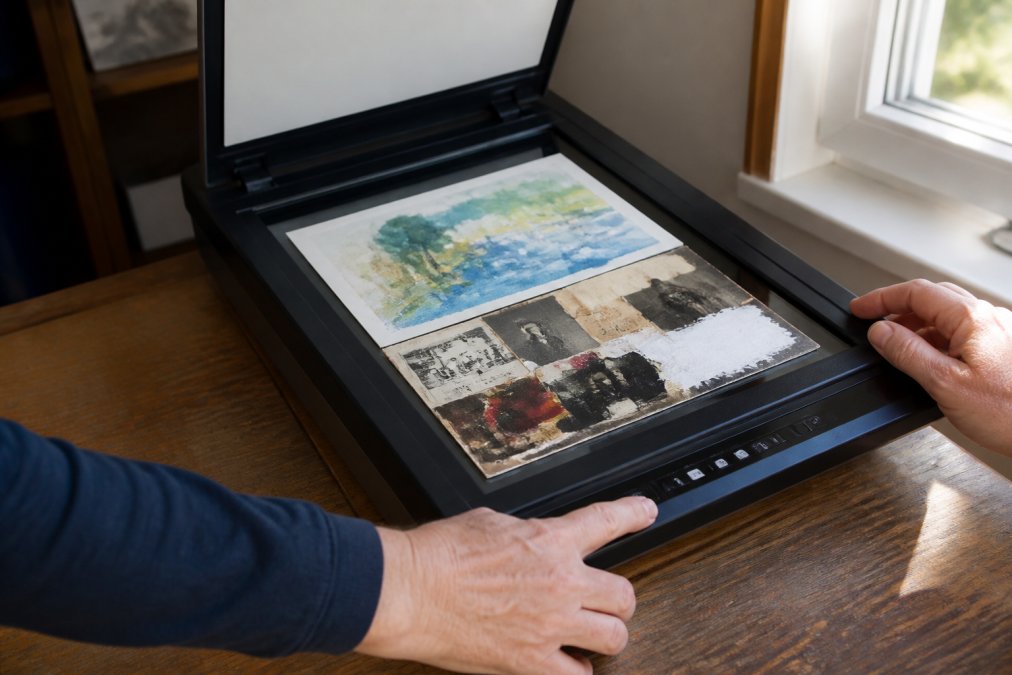
Digitizing mixed media formats is the process of converting varied physical materials, such as photographs, documents, and textured artwork, into high-resolution digital files. The core difficulty is that no single scanner setting works well across different media types. A glossy photo reflects light differently than matte watercolour paper, and a thick collage casts shadows that a standard lid cannot accommodate.
Most guides treat every item as a flat, uniform sheet of paper. That assumption fails the moment you place a textured canvas or a polaroid with a plastic sleeve on the glass. At Showbiz Video Productions, we have over 20 years of experience handling fragile and awkward media, and the single most common cause of poor results is using a one-size-fits-all approach to capture. This guide from Showbiz Video Productions breaks down how to digitize mixed media formats properly, covering equipment matching, colour management, and file formats so you can preserve originals with confidence.
Digitize Mixed Media the Right Way: A Step-by-Step Framework
The most reliable way to digitize mixed media is to treat each format as its own project with distinct output goals. Before you touch a scanner, decide what the files are for. A family photo destined for a 20×30 cm print needs far more detail than the same image shared in a WhatsApp group. That decision drives every subsequent choice, from resolution to file type.
Step 1: Inventory Your Media and Set Your Output Goals
Start by sorting your collection into groups based on material type and condition. Separate rigid items like slides and negatives from flexible prints, and isolate anything with texture, such as canvas or embossed paper. For each group, define the final use: archival backup, reprinting, or online sharing. This inventory prevents you from rescanning later because you chose the wrong specifications the first time.
Step 2: Match Your Equipment to the Format
A standard flatbed scanner is ideal for flat paper up to A4 size, but it struggles with thick books, negatives, or three-dimensional objects. For film negatives and slides, you need a dedicated film scanner or a flatbed with a transparency unit, which provides backlighting to reveal the image. Textured or bulky items often require a camera-based setup with copy stands and controlled lighting rather than a scanner lid pressing down on the artwork.
Step 3: Configure Scanner Settings and Resolution (DPI)
Resolution, measured in dots per inch (DPI), determines how much detail the scanner captures. For most prints and documents, 300 DPI is sufficient for a high-quality digital reproduction that prints well (loc.gov). If you plan to enlarge an image or crop into details, scan at 600 DPI to retain flexibility. Beyond 600 DPI, you gain little for standard prints and only create massive files that slow down your computer. Optical resolution matters more than the interpolated numbers advertised on scanner boxes; interpolation is software guesswork that adds no real detail.
Step 4: Manage Color Profiles and Calibration
Colour accuracy depends on calibrating your monitor and scanner to a shared standard. A colour profile is a set of data that tells your software how to display colours correctly. For web use, sRGB is the safe default because most screens and browsers expect it. For fine-art printing, Adobe RGB offers a wider colour gamut, but you need a printer and paper that support it. Calibrate your monitor with a hardware device so what you see on screen matches the original, and disable the scanner’s automatic colour correction to capture a neutral, unadjusted image.
Step 5: Choose the Right File Format (TIFF, PSD, PNG)
The file format you choose determines how much quality survives the digitization process. TIFF is a non-lossy format that preserves every detail captured, making it the standard for archival master files (archives.gov). PSD is useful when you plan heavy post-processing in Adobe Photoshop because it retains layers and editing history. PNG also uses non-lossy compression and handles text and graphics well, but it lacks the colour depth flexibility of TIFF for professional editing. Avoid JPEG for master files; its lossy compression discards image data each time you save, degrading quality permanently.
Step 6: Post-Processing and Digital Editing
Once scanned, your files need basic post-processing to correct issues that occurred during capture. Start with white balance to remove colour casts from old photos, then adjust levels to restore contrast and dynamic range. Cropping and straightening fix composition problems, while dust and scratch removal tools clean up surface damage. Work on a copy of your master TIFF file, never the original scan, so you can return to a clean source if an edit goes wrong.
How to Digitise Old VHS Tapes and Film Reels at Home
Digitising old VHS tapes and film reels is a different process to scanning, because it requires real-time playback rather than a single capture. To digitise old VHS tapes at home, you need a working VCR, a capture device that converts the analogue signal to digital, and software to record the output. Clean the tape heads and the tapes themselves before playback, as dust causes dropouts in the video signal. Film reels are more demanding again: they require a projector with variable speed control and a camera or scanner that can capture each frame without flicker. The playback equipment itself can damage fragile media, so if a tape has not been played in decades, the risk of it jamming or tearing increases significantly.
Mobile Scanning vs. Flatbed Hardware for Textured Work
For textured or three-dimensional mixed media, think impasto oil paintings, thick collage, fabric art, or works with embedded objects, a standard flatbed scanner is the wrong tool. The lid presses down, flattening the texture and casting harsh shadows that obscure the work’s physical depth. To capture these pieces faithfully, you need a camera-based setup. This is the gap most guides ignore, and it is where you can achieve results that rival professional reproduction studios.
The Camera-Based Setup: A Practical Guide
A mobile phone camera, used correctly, is often superior to a flatbed for textured work. The key is to control the environment and the capture process to overcome the phone’s automatic processing.
1. The Rig: Stability is Everything
- Copy Stand: Mount your phone on a copy stand or a sturdy tripod with a horizontal arm, pointing the lens directly down at the artwork. This ensures the sensor plane is perfectly parallel to the art, preventing keystone distortion (where the top of the image is narrower than the bottom).
- Remote Shutter: Use a Bluetooth remote or the phone’s self-timer to trigger the shutter. Touching the screen introduces vibration that blurs the image, especially at the high magnifications needed for fine detail.
2. Lighting: The Key to Preserving Depth
The goal is to reveal the texture without creating harsh, distracting shadows. The standard approach is to use two identical light sources (softboxes or daylight-balanced LED panels) placed at 45-degree angles to the artwork. This creates even illumination across the surface.
- For pronounced texture: To emphasise the relief of impasto or collage, move one light source to a more acute angle (e.g., 30 degrees). This creates longer shadows that define the physical peaks and valleys of the work. This is a stylistic choice, experiment to find the angle that best represents the piece.
- For reflective or glossy surfaces: Diffuse the light heavily using softboxes or a diffusion sheet. Direct light will create specular highlights (glare) that obscure the image. A polarising filter on the phone lens can also help cut glare, but it will also reduce the visibility of texture, so use it selectively.
3. Overcoming Phone Limitations: The RAW Workflow
A phone’s default camera app applies heavy processing, sharpening, noise reduction, and colour saturation, that you cannot control. To bypass this, you must shoot in a RAW format.
- What is RAW? RAW is a file format that captures the unprocessed data from the camera’s sensor. It gives you the same editing flexibility as a TIFF file from a scanner, allowing you to adjust white balance, exposure, and colour with no quality loss.
- How to shoot RAW on a phone: Both Apple (ProRAW on iPhone Pro models) and Android (via apps like Adobe Lightroom or ProShot) offer RAW capture. Open the app, switch to Pro mode, and select RAW or DNG as the file format.
- The trade-off: RAW files are large and require post-processing. You cannot share them directly. But for a master archival file of a textured artwork, this workflow is the only way to get professional-grade results from a mobile device.
When a Flatbed is Still the Right Choice
Despite its limitations with texture, a flatbed scanner remains the superior tool for flat, colour-critical work. For photographic prints, documents, and flat paper art, a scanner provides:
- Consistent, diffuse lighting: The internal light source is calibrated and even, eliminating the risk of glare and shadows.
- True optical resolution: A 2400 DPI flatbed captures far more physical detail than a phone camera’s 12-megapixel sensor, which is limited by its lens and pixel pitch.
- Predictable colour: With calibration, a scanner’s colour output is repeatable and controllable, which is essential for matching a print to an original.
The decision rule is simple: If the artwork has physical depth you want to preserve, use a camera. If it is flat and you need maximum detail and colour accuracy, use a scanner.
Batch Processing Workflows for Large Collections
When you have hundreds of items, scanning one at a time is not viable. Batch processing means scanning multiple items in a single pass and splitting them into individual files in post-production. Set your scanner software to preview mode, place several photos on the glass with small gaps between them, and create individual scan regions for each item. Name your files consistently at the point of capture, using a structure like FamilyName_Year_Description, so you do not face a renaming nightmare later. For large collections, workflow software that automates cropping and straightening saves hours, but always spot-check the automated results before deleting originals.
The Cost of Digitising Media Collections: DIY vs. Professional Media Conversion Services
The real cost of digitising a media collection is not just money; it is time, equipment, and the risk of damaging irreplaceable originals. A DIY approach requires purchasing a scanner, a VCR, capture hardware, and software, plus the hours spent learning and executing each conversion. If you already own the gear, the marginal cost is low, but the time commitment for a large collection is substantial. For those weighing the cost of digitising media collections against their own time, professional media conversion services make sense when you value speed, quality, and the safe handling of fragile originals. Showbiz Video Productions offers the fastest turnaround times, including same-day service in most cases, with professional-grade equipment and transparent, affordable pricing to suit any job size. Check the National Film and Sound Archive of Australia guidance on preserving personal collections for official recommendations on storage and digitisation standards.
Conclusion: Preserve Your Originals and Archive Your Files
Digitizing mixed media formats demands a deliberate approach: match your equipment to the material, configure resolution and colour settings correctly, and save master files in non-lossy formats. The effort protects your originals from physical degradation while making your memories accessible on modern devices. When the collection is large, the formats are fragile, or you lack the playback equipment, professional help is the safer route. Get a quote from Showbiz Video Productions and let our expert team preserve your treasured memories for generations to come.
Frequently Asked Questions
What is the best way to digitise fragile mixed media formats?
Use a flatbed scanner with a ‘texture’ or ‘relief’ setting if available, as it captures depth without pressing the item flat. For fragile pieces, place a soft, lint-free cloth between the artwork and the lid. Scan at a high DPI (600 or more) to capture detail in one pass, minimising handling. For extremely delicate items, professional media conversion services use specialized overhead cameras that never touch the original.
What is the best scanner setting for watercolor paintings and textured paper?
Set your scanner to 600 DPI minimum for archival quality. Disable any automatic ‘descreen’ or ‘sharpen’ features, as they can introduce artifacts on textured surfaces. For color accuracy, ensure your scanner’s color profile is set to Adobe RGB. If your scanner has a ‘de-texture’ option, turn it off; you want the scanner to capture the paper’s tooth, which is part of the original’s character.
How do I ensure high-quality digital files when converting mixed media?
Focus on three things: resolution, bit depth, and file format. Scan at 600 DPI with a 48-bit color depth to capture the full dynamic range. Save the master file as a TIFF to avoid lossy compression artifacts. Finally, create a calibrated workspace; if your monitor is not calibrated, you cannot trust the colors you see on screen, which will lead to incorrect corrections during post-processing.
How to digitise old VHS tapes at home without losing quality?
You need a VCR, an analog-to-digital converter, and capture software. Clean the VCR heads before playback. Use a converter that supports TBC (Time Base Correction) to stabilise the signal. Capture in an uncompressed or lightly compressed format like AVI or a high-bitrate MPEG-2. Do not capture directly to a low-bitrate MP4, as this permanently loses detail that cannot be recovered later.
Is it better to digitise mixed media myself or use a professional service?
The choice depends on your volume, technical comfort, and the value of the originals. DIY is cost-effective for small batches if you already own a scanner or capture hardware, but it is time-consuming to learn and execute well. Professional media conversion services offer faster turnaround, handle fragile or obsolete formats safely, and use calibrated, professional-grade equipment, which is often worth the cost for irreplaceable family memories.
How long does it take to digitise a large collection of mixed media?
A single high-resolution scan can take 2-5 minutes, but post-processing and color correction can take 10-20 minutes per image. VHS capture is real-time, so a 2-hour tape takes 2 hours to capture. A large collection will take weeks of dedicated work if done alone. Professional services use batch workflows to process high volumes efficiently, offering same-day or next-day turnaround for standard jobs.
What is the 70/30 rule in art reproduction?
In the context of scanning artwork, the 70/30 rule is less about a specific ratio and more about focus. It suggests that 70% of your success comes from the capture phase (lighting, resolution, focus) and only 30% from post-processing. This means you cannot fix a poorly lit or blurry scan in Photoshop. Getting the scanner settings and lighting right initially is more critical than relying on editing software.