
Table of Contents
- The Golden Rule of Digitisation: Originals First, Always
- Sort Before You Scan: A Workflow for Mixed Media Collections
- Best Equipment for Digitising Old Photos, Film, and Tape
- File Formats, Bit Depth, and Master File Strategy
- Archival Storage Standards for Mixed Media Digital Files
- DIY vs. Outsourcing Digitisation Services: Cost and Quality
- Conclusion
Last Updated: August 15, 2026
The Golden Rule of Digitisation: Originals First, Always
The single most important principle when you digitise mixed media is this: every decision you make must protect the physical original above all else. A failed scan can be repeated. A snapped film reel or a demagnetised tape cannot be recovered.
This sounds obvious, but it is the rule most people break first. They rush to get the scanner running, handle tapes without gloves, or stack fragile reels on top of each other while working through a box. The damage that results is permanent and heartbreaking.
At Showbiz Video Productions, we have seen collections in every condition imaginable over more than 20 years of professional media conversion. The collections that survive the process intact are the ones where the owner, or the technician, treated the originals as irreplaceable from the first moment they touched them. Because they are.
Digitisation is, at its core, a preservation act. The goal is to create a high-resolution master file that captures everything the original contains, so the physical item can be safely stored and rarely touched again. Get that master file right, and the original’s job is essentially done. Get it wrong, and you may need to handle a fragile, degrading item a second time.
Every handling decision, every format choice, and every storage strategy in this guide exists to serve one outcome: a perfect digital copy that makes the original untouchable.
Sort Before You Scan: A Workflow for Mixed Media Collections
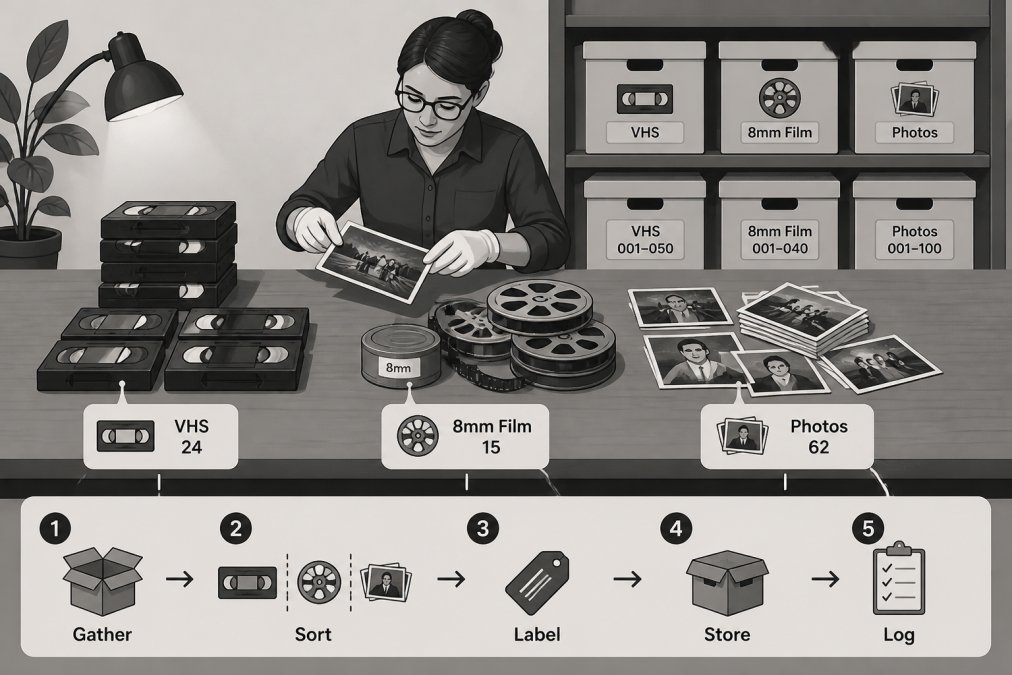
Most guides skip straight to equipment. That is a mistake. Before any scanning or capture begins, you need a clear picture of what you have, what condition it is in, and what order to tackle it.
Triage by Format and Condition
Lay everything out and group items by format: photographs, slides, negatives, VHS tapes, Betamax, 8mm or Super 8 film reels, audio cassettes, vinyl records. Each format requires different equipment, different handling, and different file settings. Mixing them in a single pass creates confusion and errors.
Within each format group, assess condition. Look for:
- Photographs and prints: fading, foxing, surface mould, brittleness, or adhesion to albums
- Film reels: vinegar syndrome (a sharp acidic smell), shrinkage, brittleness, or visible mould
- Magnetic tapes (VHS, Betamax, cassette): mould on the tape surface, sticky-shed syndrome, warped cassette shells, or broken leaders
- Vinyl records: deep scratches, warping, or surface contamination
Items showing active mould or significant physical damage need specialist attention before any digitisation attempt. Running a mouldy tape through a playback head spreads contamination and can destroy both the tape and the equipment.
Prioritise by Risk of Degradation
Not all media degrades at the same rate. Acetate film reels suffering from vinegar syndrome are deteriorating actively and should move to the top of your queue. Colour photographs from the 1970s and 1980s are often fading faster than black-and-white prints from decades earlier. Magnetic tape formats, particularly VHS and Betamax, have a finite playback life and lose signal quality with each pass through a head.
A practical prioritisation framework:
| Format | Degradation Risk | Priority Level |
|---|---|---|
| Acetate film (vinegar smell) | Critical | Immediate |
| Colour slides (1970s-80s) | High | Within weeks |
| VHS / Betamax tapes | High | Within months |
| Colour prints (pre-1990) | Moderate | Within a year |
| Black-and-white prints | Lower | Flexible |
| Vinyl records | Lower | Flexible |
Tackle the highest-risk items first. Everything else can wait.
Best Equipment for Digitising Old Photos, Film, and Tape
Choosing the right equipment is where the quality gap between a home effort and a professional result becomes most visible. The best equipment for digitising old photos, slides, and documents is not necessarily the most expensive, but it must be matched precisely to the format.
Flatbed Scanners and Resolution Settings
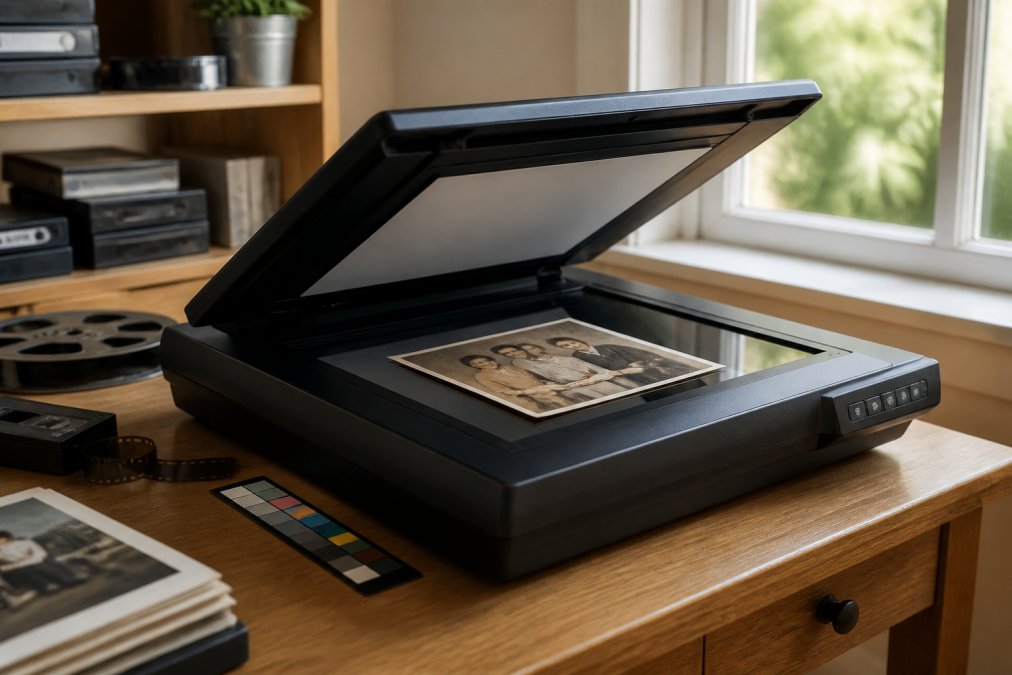
A flatbed scanner with a transparency adapter is the standard tool for photographs, slides, negatives, and documents. The key specifications to understand are optical resolution (measured in DPI or PPI) and bit depth.
For archival-grade results:
- Photographic prints: scan at a minimum of 600 DPI; 1200 DPI for smaller prints you may want to enlarge
- 35mm slides and negatives: 2400 DPI minimum; 4000 DPI for archival masters
- Medium-format film: 1200-2400 DPI depending on original size
- Documents: 300-400 DPI is sufficient for text; 600 DPI if the document contains fine detail or illustrations
Bit depth matters as much as resolution. A 24-bit colour scan captures a broad tonal range. A 48-bit scan captures significantly more, which gives you greater flexibility when correcting faded or colour-shifted originals in post-processing. For archival masters, scan at the highest bit depth your equipment supports.
Colour calibration is non-negotiable for accurate results. Use a calibration target or colour checker card and profile your scanner before starting a session. Without calibration, colours will shift unpredictably across batches, and you will have no reliable baseline for comparison.
Always perform a test scan on a representative item from each format group before committing to a full session. Adjust your settings based on that test rather than assuming one profile works for everything.
Analog-to-Digital Capture for Video and Audio
Video and audio formats require a different approach entirely. Analog-to-digital conversion for video means playing back the original tape through a calibrated playback deck and capturing the signal in real time via a video capture device.
The playback deck is the most critical component. A consumer-grade VCR from a second-hand shop will not produce the same signal quality as a professional broadcast-grade deck with time-base correction. Time-base correction stabilises the video signal and compensates for the mechanical inconsistencies of aging tape, which is why professional results look markedly better than home transfers.
For audio formats, including cassettes and vinyl, a quality phono preamp and a high-resolution audio interface are essential. Sampling rate for archival audio masters should be at minimum 96 kHz at 24-bit depth, per guidelines from organisations such as the International Association of Sound and Audiovisual Archives.
File Formats, Bit Depth, and Master File Strategy
The file format you choose for your master files determines whether your digital archive will still be readable in 20 years. This is not a minor technical detail.
Non-lossy file formats are the only acceptable choice for archival masters. A lossy format like JPEG discards image data every time the file is saved, compounding quality loss over time. For a master file, that is unacceptable.
Recommended archival formats by media type:
- Still images: TIFF is the gold standard. It supports lossless compression, high bit depth, and is widely supported by archival institutions. PNG is an acceptable alternative for images without embedded colour profiles.
- Video: Uncompressed AVI or MOV for masters where storage permits. For practical master files, a high-bitrate lossless codec such as FFV1 within an MKV container is increasingly recognised by archival bodies including the National Film and Sound Archive of Australia.
- Audio: WAV or AIFF for masters. FLAC for lossless compressed derivatives.
The master file strategy is straightforward: create one high-resolution, non-lossy master file per item and never edit it. All derivative files for sharing, playback, or web use (MP4, JPEG, MP3) are generated from the master. The master itself is stored and left untouched.
Derivative files serve everyday use. A compressed MP4 of a family video is easy to share and plays on any device. The archival master is the insurance policy behind it.
Never use JPEG as your only saved copy of a digitised photograph. JPEG compression permanently discards image data, and re-saving the file compounds the loss. Always retain the TIFF or RAW master.
Archival Storage Standards for Mixed Media Digital Files
Creating excellent digital files is only half the job. Archival storage standards for mixed media require a deliberate, redundant approach to keeping those files safe over the long term.
Digital obsolescence is a real threat. Storage media fails. File formats become unsupported. Hard drives have an average operational lifespan measured in years, not decades. A plan that relies on a single hard drive sitting in a drawer is not a preservation strategy.
The 3-2-1 Backup Rule
The 3-2-1 backup rule is the baseline standard recommended by archival institutions and IT security professionals alike. As outlined by the Australian Cyber Security Centre, maintaining multiple copies across different media types significantly reduces the risk of total data loss.
The rule works as follows:
- 3 copies of every file (the original plus two backups)
- 2 different storage media types (for example, an external hard drive and a cloud service)
- 1 copy stored off-site (a separate physical location, or a cloud platform)
For a home collection, a practical implementation looks like this: the master files live on an external hard drive kept at home, a second copy sits on a cloud storage service, and a third copy is on a drive kept at a relative’s house or a secure off-site location.
Storage media should be checked and migrated every three to five years. Do not assume a hard drive written in 2026 will be readable in 2041 without intervention.
File Naming Conventions and Metadata
A digital archive without meaningful file names and metadata is nearly impossible to navigate in ten years. Consistent file naming conventions and embedded metadata are what separate a usable archive from a folder of files named scan001.tif.
A reliable naming convention follows this structure:
[Family/Collection Name]_[Year]_[Subject/Event]_[Sequence Number]
Example: Barry_1987_ChristmasDay_001.tif
Metadata should be embedded directly into each file where the format supports it. For images, use IPTC or XMP fields to record the date, subject, location, and any known provenance details. For video and audio files, embed metadata in the file’s header fields. This information travels with the file regardless of where it is copied or stored.
Collection management software can assist with batch metadata entry and helps maintain data integrity across large collections. Many archival institutions provide guidance on metadata standards; the Australian Institute for the Conservation of Cultural Material is a useful reference point for best-practice approaches to collection documentation.
DIY vs. Outsourcing Digitisation Services: Cost and Quality
This is the question most people avoid asking honestly: should you do this yourself, or hand it to professionals?
The honest answer depends on three factors: the condition of your originals, the volume of material you have, and the equipment you can realistically access.
DIY digitisation makes sense when:
- Your collection is primarily flat items (prints, documents, slides) in good condition
- You own or can borrow a quality flatbed scanner
- Your volume is manageable, under a few hundred items
- You have time to learn proper technique and calibration
Outsourcing digitisation services becomes the better choice when:
- You have magnetic tape formats requiring specialist playback equipment
- Items show signs of physical damage, mould, or deterioration
- Your volume runs into hundreds or thousands of items
- The material is irreplaceable and the risk of a DIY error is unacceptable
The cost calculation is not always straightforward. A quality flatbed scanner capable of archival-grade results represents a meaningful upfront investment. Add the time required to scan, calibrate, name, and back up a large collection, and the economics of professional services often compare favourably, particularly for tape formats where the required equipment is expensive and technical.
Showbiz Video Productions handles exactly this scenario: mixed collections spanning VHS tapes, 8mm film reels, audio cassettes, and vinyl records, managed with professional-grade equipment and more than 20 years of hands-on experience. For collections where the stakes are high and the formats are varied, professional handling removes the risk that a DIY approach cannot.
The threshold question is simple: if you damaged an item during a DIY attempt, how would you feel? If the answer is "devastated," outsourcing is the right call.
Before committing to a DIY approach for tape formats, ask yourself whether you have access to a broadcast-grade playback deck with time-base correction. If the answer is no, the quality ceiling of your transfer will be set by that limitation, regardless of everything else you do correctly.
Preserving a large mixed media collection is genuinely complex work. The combination of format variety, condition assessment, equipment requirements, and long-term storage planning means that many families end up with partially digitised collections or, worse, damaged originals from well-intentioned but poorly executed attempts. Showbiz Video Productions offers over 20 years of professional experience converting VHS, film reels, cassettes, and vinyl into high-quality digital files, with same-day service available and professional-grade equipment handling every format. Get a quote from Showbiz Video Productions and give your family’s memories the preservation they deserve.
Frequently Asked Questions
How do I digitise thousands of photos without damaging them?
Work in small batches and handle prints only by their edges, wearing lint-free cotton gloves. Use a flatbed scanner set to at least 600 DPI for standard prints and 1200 DPI or higher for slides and negatives. Avoid high-heat drum scanners on fragile originals. Save each scan as a TIFF master file before creating smaller JPEG derivatives. If the volume is very large or the prints are brittle, a professional digitisation service with archival-grade equipment is the safest option.
What equipment is required for professional-grade media digitisation?
Photo and document digitisation requires a flatbed scanner capable of at least 600 DPI with colour calibration. Film reels and slides need a dedicated film scanner or a flatbed with a transparency adapter. VHS and other video tapes require a functioning playback deck connected to a professional analog-to-digital capture card. Audio formats such as cassettes and vinyl need a calibrated playback device feeding into audio-capture software at a minimum 24-bit, 96 kHz sampling rate. Colour calibration targets are essential across all formats to ensure accurate reproduction.
When should I outsource digitisation to a professional service?
Outsourcing makes sense when your media is fragile, mouldy, or showing signs of vinegar syndrome, when you lack compatible playback equipment, or when the collection is large enough that DIY would take weeks. Professionally maintained decks and scanners reduce the risk of mechanical damage to irreplaceable originals. A reputable service will also supply archival-grade digital masters in non-lossy formats, saving you the cost of purchasing specialist hardware that you may only use once.
How should I prepare fragile documents and film for scanning?
Store fragile originals in a cool, dry environment for at least 24 hours before handling to stabilise them. Wear clean cotton gloves and support items fully when moving them. Never force a curled or brittle document flat on a scanner bed, allow it to relax naturally or use a book scanner that does not require pressure. Check film reels for brittleness and a vinegar smell before threading them through any playback equipment, and flag severely deteriorated items for professional assessment before attempting digitisation.
This article was written using GrandRanker