
Table of Contents
- What You’ll Need to Transfer Vinyl Records to Digital Format
- How to Clean Vinyl Records Before Recording
- Vinyl to Digital Audio Software: Choosing the Right Option
- Step-by-Step: Connecting Your Turntable and Recording
- Post-Processing: Noise Reduction, Normalisation, and File Formats
- Copyright and Legal Considerations for Vinyl Digitisation
- Professional Vinyl Transfer Services: When DIY Isn’t Enough
- Conclusion
Last Updated: August 12, 2026
What You’ll Need to Transfer Vinyl Records to Digital Format
To transfer vinyl records to digital format, you need three core components: a turntable with a phono preamp, an analog-to-digital converter or USB audio interface, and recording software on your computer. Getting any one of these wrong produces audio that’s either silent, distorted, or unlistenable.
At Showbiz Video Productions, we’ve handled vinyl digitisation for clients across many formats and conditions. Below, we’ll walk through every piece of equipment, software choice, and step you need to get a clean, archival-quality recording.
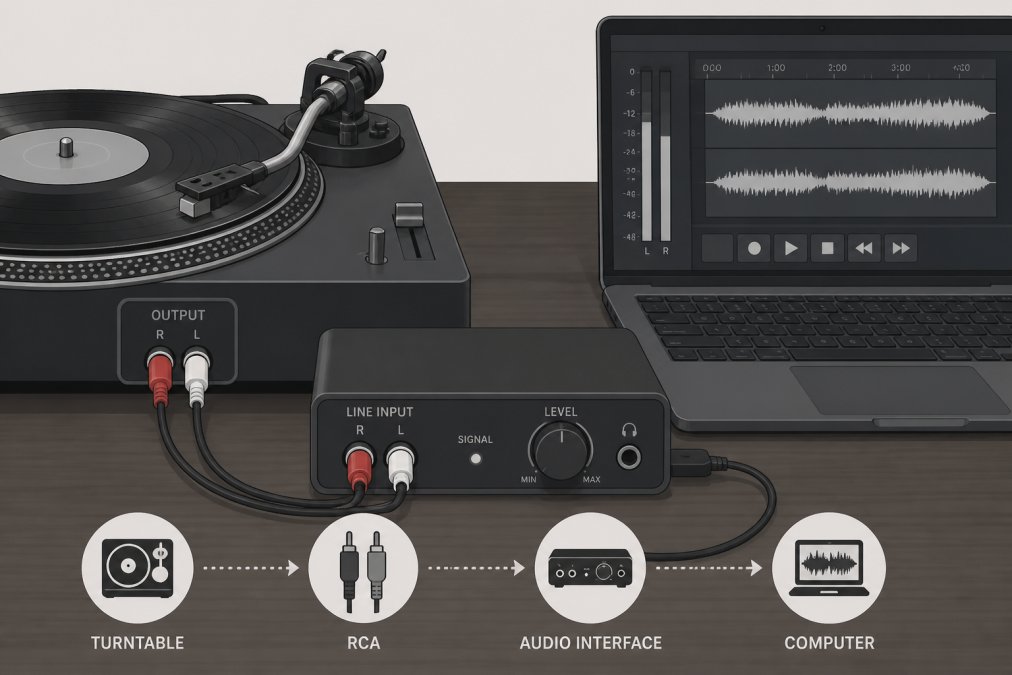
Turntable and Phono Preamp
A standard turntable outputs a low-level phono signal that requires amplification and equalisation before recording. Most modern receivers lack a phono input, so if your turntable lacks a built-in preamp, you need a separate phono preamp between the turntable and your audio interface.
Check whether your turntable has a built-in preamp first. Many entry-level USB turntables include one. If yours does not, a dedicated phono preamp preserves signal fidelity far better than generic amplification. The tonearm, stylus condition, and cartridge alignment all affect final recording quality.
Before recording anything, check your stylus under a magnifying glass. A worn or bent stylus causes distortion that no software can fix. Replacement styli are inexpensive and the single fastest improvement you can make to recording quality.
Analog-to-Digital Converter or USB Interface
The analog-to-digital converter (ADC) translates the analog audio signal from your turntable into digital data your computer can record. A dedicated USB audio interface with a line-level input gives you far better signal-to-noise ratio than your laptop’s built-in sound card.
Connect the phono preamp’s output to the line-level input on your USB interface using RCA cables. A USB cable then runs to your computer. This signal chain keeps the audio clean and eliminates most ground loop hum before it reaches your recording software.
Hardware Compatibility for Modern Laptops
Modern laptops commonly ship with USB-C ports only, while many audio interfaces still use USB-A connectors. Before purchasing an interface, confirm whether you need a USB-C to USB-A adapter. MacOS and Windows 11 both support class-compliant USB audio devices without additional drivers. If your interface requires proprietary drivers, download them from the manufacturer’s site before connecting the hardware.
How to Clean Vinyl Records Before Recording
Cleaning vinyl records before recording is essential. Dust, oils, and debris embedded in the grooves produce pops, clicks, and surface hiss that degrade every recording, regardless of equipment quality.
The most effective approach is a three-step process:
- Dry brush first. Use a carbon fibre anti-static brush, sweeping from the centre outward in the direction of the grooves. This removes loose dust and discharges static.
- Wet clean for deeper contamination. Apply a record cleaning fluid with a microfibre pad, working in circular motions along the groove path. Avoid getting fluid on the label.
- Dry thoroughly before playing. Give the record at least two minutes of air drying before placing it on the platter.
For records in very poor condition, a record cleaning machine uses vacuum suction to remove fluid and debris far more thoroughly than manual methods. According to IASA Technical Committee guidelines on audio preservation, proper cleaning is one of the most critical steps in archival digitisation because groove contamination causes irreversible playback damage over time.
Never use household cleaning products, alcohol above 25% concentration, or tap water on vinyl records. These strip the groove walls and cause permanent surface damage that shows up as broadband hiss in every future recording.
Vinyl to Digital Audio Software: Choosing the Right Option
The right vinyl to digital audio software depends on how much control you want over recording and post-processing. Audacity is the most widely used free option. It records multi-track audio, includes basic noise reduction and click removal tools, and exports to WAV, FLAC, and MP3.
Paid options offer more sophisticated audio restoration tools, including spectral repair and adaptive noise reduction. These matter most when working with heavily damaged records. However, the software itself contributes little to the quality of your raw recording, your hardware chain determines that. Software matters most in post-processing.
Setting Sample Rate and Bit Depth
For vinyl archiving, record at 24-bit depth and 96 kHz sample rate as your working format. This gives you significant headroom for editing and noise reduction without introducing processing artefacts.
A 16-bit / 44.1 kHz recording (standard CD quality) is acceptable for casual listening copies, but it limits your ability to recover dynamic range during post-processing. According to Library of Congress digital preservation guidelines, archival audio recordings should be captured at a minimum of 24-bit / 96 kHz to ensure long-term preservation fidelity.
| Setting | Casual Listening | Archival Master |
|---|---|---|
| Bit depth | 16-bit | 24-bit |
| Sample rate | 44.1 kHz | 96 kHz |
| File format | MP3 or FLAC | WAV or FLAC |
| Approx. file size per LP | 50-80 MB | 400-700 MB |
| Post-processing headroom | Limited | Extensive |
Step-by-Step: Connecting Your Turntable and Recording
Follow these steps in order. Skipping ahead is the most common cause of ground loop hum and failed first recordings.
- Connect the turntable’s RCA cables to the phono preamp input. If your turntable has a ground wire, attach it to the ground terminal on the preamp to eliminate 50 Hz hum.
- Connect the phono preamp’s output to the line-level input on your USB audio interface using RCA cables or an RCA-to-TRS adapter.
- Connect the USB interface to your laptop and confirm your operating system recognises it as an audio input device.
- Open your recording software and set the input source to your USB interface. Set sample rate to 96 kHz and bit depth to 24-bit.
- Play 30 seconds of the record before committing to a full recording. Watch the input level meters.
- Adjust input gain on the interface until peaks reach approximately -6 dBFS. This gives you 6 dB of headroom to prevent clipping.
- Start recording, then lower the needle to the beginning of the record. Record the full side without interruption.
- Stop recording and save the raw file before any processing.
Monitoring Levels and Avoiding Clipping
Clipping is the most damaging recording error you can make. It occurs when the input signal exceeds 0 dBFS, causing the waveform to be truncated and producing harsh, distorted sound that cannot be repaired in post-processing.
Watch your input meters throughout the recording. If any peaks hit 0 dBFS, stop, reduce the input gain on your interface, and re-record from the beginning. A recording that peaks at -3 to -6 dBFS sounds identical after normalisation, but a clipped recording is permanently damaged. Headroom is insurance.
Post-Processing: Noise Reduction, Normalisation, and File Formats
Post-processing is where a raw vinyl recording becomes a listenable digital file. The sequence matters: always remove noise before normalising, and always normalise before exporting your final file.
The standard workflow is:
- Pop and click removal. Apply a declicker to address sharp transients caused by dust and surface scratches.
- Noise reduction. Capture a noise profile from a silent section of the record, then apply broadband noise reduction across the full track. Use conservative settings, over-aggressive noise reduction produces a watery, artefact-heavy sound worse than the original hiss.
- Normalisation. Raise the peak level of the processed audio to -1 dBFS to maximise dynamic range without risking clipping.
- Track splitting. Manually mark the start and end of each track, then export individual files.
Noise reduction is a trade-off, not a free fix. A light touch preserves the warmth and character of the original recording. Aim for “better than before,” not “perfectly clean.”
WAV vs FLAC vs MP3: Which Format to Choose
The right file format depends on your intended use. WAV is the uncompressed, lossless standard for archival masters. FLAC is lossless compressed, meaning the file is smaller than WAV but bit-for-bit identical on playback. MP3 is lossy compressed, meaning audio data is permanently discarded to reduce file size.
For archival purposes, keep your master files as WAV or FLAC. For sharing with family or streaming, export a separate MP3 copy at 320 kbps. Never discard your lossless master in favour of a compressed copy.
Metadata, ID3 Tags, and Archival Storage
Metadata makes a digitised record collection actually usable. Without it, you have thousands of files named track01.wav with no context. ID3 tags store the artist name, album title, track number, year, and genre directly inside the audio file.
Tools like MusicBrainz Picard can match your audio files against a database of recordings and populate ID3 tags automatically. According to MusicBrainz open music metadata database, their database contains metadata for tens of millions of recordings, making it the most comprehensive free resource for tagging digitised vinyl collections.
For archival storage, follow the 3-2-1 rule: three copies of every file, on two different media types, with one copy stored off-site or in cloud storage. Hard drives fail. Redundancy is the only reliable preservation strategy.
Copyright and Legal Considerations for Vinyl Digitisation
Digitising vinyl records for personal use is generally permissible under Australian copyright law. Under the Copyright Act 1968 (Cth), the copyright in a sound recording is separate from the copyright in the underlying musical composition. Both may still be in force even for decades-old recordings.
The general principle is that you may make a copy of a sound recording you own for your own private use. Sharing that copy with others, uploading it to a public platform, or distributing it commercially without a licence from the rights holder is an infringement. For recordings where copyright has expired, digitisation and distribution are permissible, but determining the expiry date requires checking both the recording copyright and the composition copyright separately.
If you are digitising recordings for institutional or archival purposes, the Copyright Act 1968 provides specific exceptions for libraries and archives, including the right to make preservation copies. For guidance specific to your situation, the Australian Copyright Council information sheets provide free, plain-language guidance on format-shifting and personal use rights.
Professional Vinyl Transfer Services: When DIY Isn’t Enough
DIY digitisation works well when your records are in reasonable condition and you have time to learn the process. It breaks down when records are heavily damaged, when you’re working with unusual formats like 78 RPM shellac discs, or when the sentimental value is too high to risk a failed attempt.
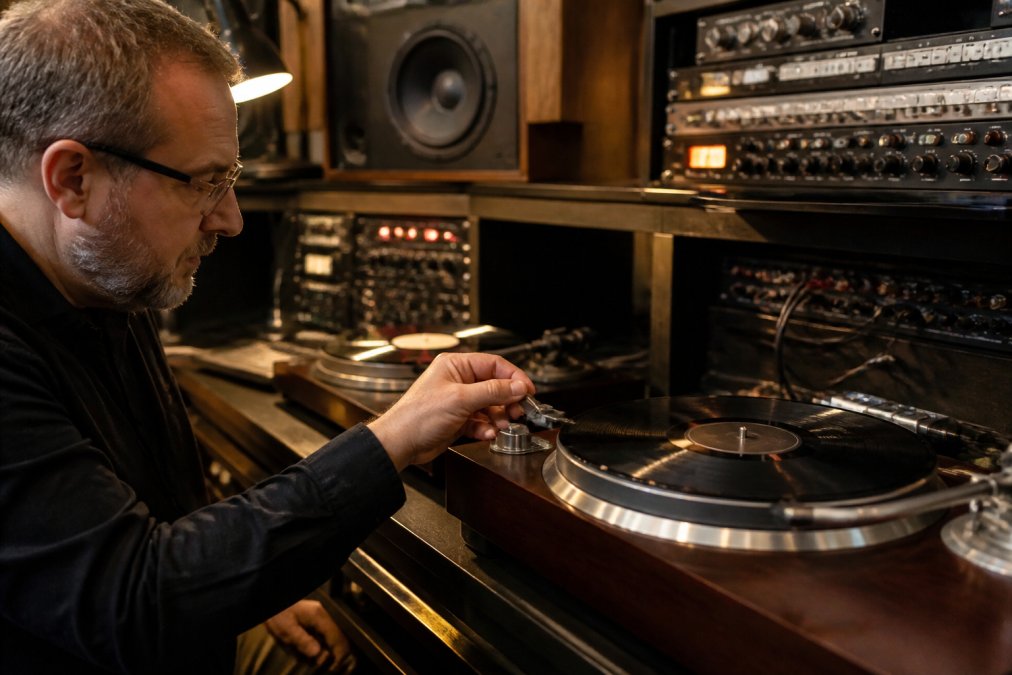
Professional vinyl transfer services use calibrated playback equipment, professional-grade analog-to-digital converters, and experienced operators who can identify and compensate for problems that software alone cannot fix. The difference in output quality between a well-executed professional transfer and a home recording is most audible on damaged records.
Showbiz Video Productions offers professional vinyl digitisation alongside conversion of VHS, 8mm film reels, cassettes, and other legacy formats. With over 20 years of experience and professional-grade equipment, the team handles formats and conditions that most home setups cannot manage. Same-day service is available for most jobs, and pricing is transparent. Visit the Showbiz Video Productions website for current pricing or to get a quote.
The honest answer to whether you should DIY or use a professional service comes down to three questions: How damaged is the record? How much is the recording worth to you? And do you have the time to learn the process properly? If any of those answers gives you pause, professional handling is the right call.
Preserving vinyl records is a race against physical degradation. Shellac and PVC both deteriorate over time, and every playback on a worn stylus causes additional groove damage. The longer you wait to transfer vinyl records to digital format, the more of the original recording you lose permanently. Showbiz Video Productions has spent more than two decades helping families and collectors protect irreplaceable recordings, with the professional-grade equipment and turnaround times to make the process straightforward. Get a quote today and make sure your records are preserved before the window closes.
Frequently Asked Questions
Do I need a special turntable to transfer vinyl records to digital?
Not necessarily. Any turntable with RCA output can work, provided you add a phono preamp and an analog-to-digital converter or USB audio interface. Some turntables include a built-in preamp and USB output, which simplifies setup. For better fidelity and lower noise, a dedicated turntable with a quality stylus and separate preamp will produce noticeably cleaner digital files than an all-in-one budget unit.
What is the best software for recording vinyl records to digital?
Audacity is the most widely used free option for vinyl digitisation. It records at high sample rates, includes pop and click removal tools, and supports WAV and FLAC export. Paid options offer more advanced audio restoration and noise reduction. Whichever vinyl to digital audio software you choose, record at 24-bit, 96 kHz for archival quality, then export a compressed version for everyday listening.
Is it better to use a professional service or do it myself?
DIY works well if you already own a decent turntable, have time to learn the software, and are comfortable with post-processing. For irreplaceable or fragile records, particularly 78 RPM discs or heavily worn LPs, professional vinyl transfer services use calibrated equipment and experienced technicians to maximise fidelity and minimise the risk of damage. If you have a large collection or mixed formats, a professional service is often faster and produces more consistent results.
How do I clean vinyl records before digitising them?
Start with a dry carbon-fibre brush to remove loose dust from the grooves before every play. For deeper cleaning, use a purpose-made record cleaning fluid applied with a soft microfibre cloth or a record cleaning machine, working in the direction of the grooves. Avoid tap water, as minerals leave residue. Allow the record to dry fully before placing it on the turntable. Clean records produce significantly fewer pops and clicks in the final digital file.
This article was written using GrandRanker