
Table of Contents
- Visual Inspection and Damage Assessment
- Preparing Your Records: What You’ll Need
- Manual Cleaning Methods for Vinyl Restoration
- Record Cleaning Machines and Deep Cleaning
- How to Digitise Vinyl Records After Cleaning
- Turntable Setup and Needle Tracking Force
- Professional Vinyl Restoration Services
- Post-Cleaning Drying and Storage
- Frequently Asked Questions
Last Updated: September 29, 2026
Visual Inspection and Damage Assessment
Before you learn how to restore old vinyl records before recording, conduct a thorough visual inspection using magnification and directional lighting. This step is critical for digitisation because it identifies damage that affects audio quality and determines whether the record is safe to play at all. Many guides skip this, but it’s essential when preparing records for high-fidelity recording.
Using Magnification and Raking Light
Examine the record under a desk lamp or LED light positioned at a low angle across the surface, this is called raking light. It reveals surface texture, scratches, and deposits that overhead lighting misses. Use a jeweller’s loupe (10× magnification) or a USB digital microscope to inspect the grooves closely. Look at multiple spots across the record, not just one area.
Raking light is particularly useful for distinguishing mold from dust. Mold appears as fuzzy, discoloured patches that follow no pattern; dust sits loosely on the surface and moves when you gently blow on it. Mold requires different treatment than dust and may indicate the record is unsafe to play without professional assessment.
Identifying Common Damage Types
Scratches and groove damage: Deep scratches that catch your fingernail or appear as continuous lines through the grooves will produce audible clicks or pops during digitisation. Hairline scratches are cosmetic and won’t affect audio significantly. Light scratches confined to the label side rarely affect playback.
Warping and dishing: Hold the record horizontally at eye level and look across the edge. A warped record will show visible bending. Slight warping (under 2mm deviation) may still play, but severe warping prevents proper stylus contact and risks damage to your turntable. Dishing, where the centre is raised, is less obvious but equally problematic.
Mold and mildew: Appears as white, green, or black spots, often with a musty smell. Surface mold can sometimes be cleaned, but deep mold penetration into the vinyl requires professional restoration. Never play a mouldy record without assessment; spores can spread to other records and damage your turntable.
Sticky residue and oxidation: Some records develop a tacky surface from poor storage or chemical breakdown of the vinyl itself. This residue transfers to the stylus and degrades sound quality. Oxidation appears as a dull, whitish film and is common on older records stored in humid conditions.
Cracks and chips: Small edge chips are cosmetic, but cracks radiating from the centre hole or across the playing surface indicate structural failure. These records are at high risk of shattering during play and should not be digitised without professional evaluation.
Pre-Cleaning Assessment Checklist
Before you commit to cleaning, document the record’s condition:
- Photograph the record under raking light, focusing on any visible damage
- Note the pressing plant, year, and any markings on the label (helps identify value and material composition)
- Check for label damage, water stains, or separation from the vinyl
- Smell the record, musty odours indicate mold or moisture damage
- Feel the surface gently; sticky or rough patches suggest residue or oxidation
- Assess warping by holding it horizontally and looking across the edge
If you identify severe warping, deep cracks, or extensive mold, professional restoration may be safer and more effective than DIY cleaning. Attempting to play a severely damaged record risks further deterioration and can damage your turntable’s stylus and tonearm.
Preparing Your Records: What You’ll Need
Gather your supplies before you start. Having everything ready makes the process faster and prevents damage from rushing.
You’ll need:
- Distilled water (not tap water, minerals damage vinyl)
- Isopropyl alcohol (70% concentration is safest)
- Microfibre cloths (lint-free only)
- Soft-bristled anti-static brush
- Clean, dry towels
- Record cleaning machine (optional but recommended)
- Label protector or plastic sleeve
- Drying rack or clean surface
Don’t use paper towels, they scratch vinyl. Never use tap water, which leaves mineral deposits that create surface noise. Avoid harsh chemicals like acetone or bleach.
If you’re cleaning multiple records, set up a clean workspace away from dust. A kitchen table with newspaper underneath works well. Keep your materials organised so you’re not searching mid-process.
Manual Cleaning Methods for Vinyl Restoration
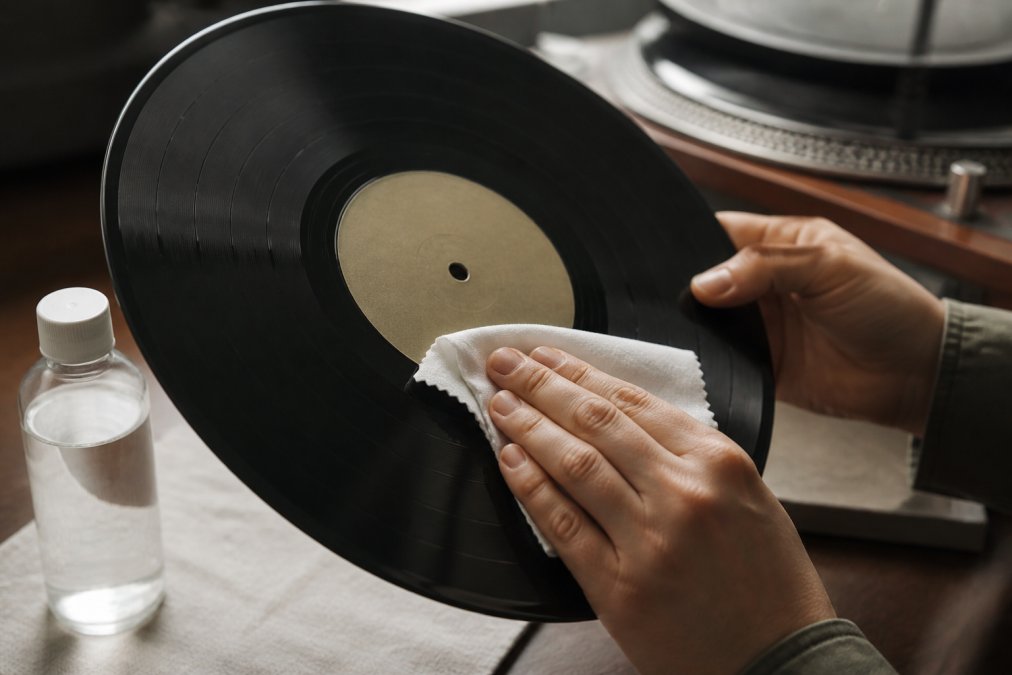
Manual cleaning is the gentlest approach for most records. It takes patience, but you control exactly what touches the vinyl.
Start by brushing the record with an anti-static brush. Brush in a straight line from the centre outward, following the grooves. This removes loose dust and debris without forcing particles deeper into the grooves. Brush both sides.
Wet Cleaning with Distilled Water
Fill a clean bowl with distilled water. Dampen a microfibre cloth, not soaking, just damp. Gently wipe the record in straight lines from centre outward. Work slowly. Don’t scrub or apply pressure.
After one pass with water, use a dry microfibre cloth to remove moisture. Again, work from centre outward in straight lines. This step matters, standing water on vinyl causes spotting and warping.
For stubborn dirt, repeat the process. Two or three passes with distilled water usually removes most surface grime. Let the record air-dry completely before playing or storing it.
Using Isopropyl Alcohol Safely
Isopropyl alcohol cuts through sticky residue and evaporates quickly. Use 70% concentration, higher percentages can damage vinyl. Never use rubbing alcohol above 70%.
Dampen a microfibre cloth with alcohol. Wipe the record in straight lines from centre outward. The alcohol evaporates fast, so you don’t need to dry it afterward. However, many people prefer to follow with a dry cloth for peace of mind.
Alcohol is safe for vinyl when used properly, but work in a ventilated space. Avoid breathing fumes directly. Never pour alcohol directly onto the record, apply it to the cloth first.
Record Cleaning Machines and Deep Cleaning
Record cleaning machines (RCMs) use vacuum suction to remove water and debris. They’re effective for deep cleaning and reduce the risk of leaving residue on the vinyl.
An RCM works in two stages. First, you apply cleaning solution and brush the record. Then the vacuum sucks up the liquid and loosened debris. This prevents water from sitting on the vinyl, which is a major advantage over manual cleaning.
If you’re preparing multiple records for digitisation, an RCM saves time and improves results. Many people hire professional services like Showbiz Video Productions to access high-quality machines without buying one.
For DIY deep cleaning without a machine, repeat manual wet cleaning several times. Each pass removes more embedded dirt. Patience is key, rushing the process can damage the vinyl.
How to Digitise Vinyl Records After Cleaning
Once you understand how to restore old vinyl records before recording and your records are clean and completely dry, you’re ready to digitise. Wait at least 24 hours after cleaning before recording to ensure all moisture has evaporated.
Connect your turntable to your computer or recording device. Use a preamp if your turntable doesn’t have one built in. Set your recording software to capture at 24-bit, 96kHz resolution for the best quality. This captures more detail than standard CD quality.
Play the record at normal speed. Monitor the levels, you want peaks around -6dB to avoid clipping. Let the entire side play without interruption. Background noise and surface crackle will be captured, but that’s normal for vinyl.
After recording, you can digitally restore the audio using software like Audacity (free) or professional tools.
Turntable Setup and Needle Tracking Force
Your turntable setup affects how the stylus reads the groove. Poor setup causes the stylus to skip or damage the vinyl further.
Professional Vinyl Restoration Services
Sometimes records are too damaged or valuable to risk DIY restoration. Professional services have industrial-grade equipment and expertise that home methods can’t match.
Post-Cleaning Drying and Storage
Drying is as critical as cleaning itself. Improper drying causes water spots, mineral deposits, mold, and warping, all of which degrade audio quality during digitisation. This is the step most guides overlook, yet it determines whether your cleaning effort succeeds or fails.
Drying Protocols to Prevent Water Spots and Mineral Deposits
After wet cleaning, moisture remaining on the vinyl surface will evaporate unevenly, leaving behind mineral deposits and water spots. These create audible noise during playback and are difficult to remove without re-cleaning.
Verifying Dryness Before Digitisation
Before playing a record for digitisation, confirm it is fully dry. Moisture trapped in the grooves causes:
- Audible crackle and pops that sound like surface noise but are actually moisture-related
- Stylus slippage, where the needle doesn’t track properly, causing skips
- Mold growth if moisture remains for days
- Warping, especially if the record is stored before drying completely
Long-Term Storage After Cleaning
Once completely dry, store records upright in their sleeves. Replace damaged or acidic inner sleeves with archival-quality paper or plastic sleeves; acidic sleeves degrade vinyl over time. Store in a cool (16-20°C), dry (30-40% relative humidity) location away from direct sunlight, heat sources, and temperature fluctuations.
Frequently Asked Questions
Can old vinyl records be restored to improve sound quality?
Yes. Restoration involves removing surface dust, debris, and static electricity that obscure the groove information. Wet cleaning with distilled water and careful manual scrubbing can significantly reduce crackle and pop, restoring clarity to the audio. However, deep scratches and worn grooves cannot be repaired, restoration works best on records with minor surface contamination. Professional vinyl restoration services use record cleaning machines and specialist techniques for more stubborn issues.
What is the safest way to clean dust and grime from vinyl records?
Start with an anti-static brush to remove loose debris, working in circular motions following the grooves. For grime, use distilled water with a soft microfibre cloth, applying gentle pressure. Isopropyl alcohol (70% concentration is safest) removes stubborn residue but must be used sparingly and allowed to evaporate fully. Avoid household cleaners, WD-40, and acetone, these damage the vinyl. Always dry records thoroughly with a lint-free cloth before storage or playback.
How do you fix a warped or dished vinyl record?
Minor warping can sometimes be improved by storing the record flat under weight in a cool, dry environment for several weeks. Severe warping is difficult to reverse permanently. Prevention is more effective: store records vertically in inner sleeves within their jackets, keep them away from heat sources, and maintain consistent temperature and humidity. If a record is critically warped before digitisation, professional services may be able to work around the issue during playback.
Is WD-40 safe for cleaning vinyl records?
No. WD-40 leaves an oily residue that attracts dust, degrades the vinyl over time, and damages the stylus. It also interferes with digitisation by creating audio artifacts. Stick to distilled water, isopropyl alcohol (90%+), or purpose-made vinyl cleaning solutions. If a record has been treated with WD-40, professional services can sometimes remove the residue, but prevention is far simpler.