
Table of Contents
- DIY vs Professional Digitization: Key Differences
- The True Cost of Digitising VHS to Digital
- Media Conversion Turnaround Times: DIY vs Professional
- Quality Comparison: Scanner vs Professional Equipment
- Preservation and Deterioration Prevention
- Storage and Backup Solutions for Your Digital Archive
- Common Mistakes to Avoid in Media Digitisation
- Diskbank Alternative for Media Transfer: What to Look For
- Frequently Asked Questions
Last Updated: September 25, 2026
DIY vs Professional Digitization: Key Differences
Professional digitization is the process of converting legacy media such as VHS tapes, film reels, cassettes and vinyl into high-quality digital files using broadcast-grade equipment and trained technicians. The core difference from a DIY setup is not just the hardware; it is the signal handling, colour recovery and condition assessment that happen before a single frame is captured.
This guide from Showbiz Video Productions breaks down the real trade-offs: cost, turnaround, quality, and long-term preservation. If you are weighing up whether professional digitization is worth it, the answer usually comes down to three things: how fragile your media is, how much your time is worth, and what you plan to do with the files afterwards.
The single biggest mistake people make is assuming a working VHS player and a capture card will produce the same result as a professional transfer. It won’t. Tapes that have sat in a garage for twenty years often need cleaning and tension adjustment before playback, and playing a deteriorated tape on worn equipment can permanently damage it.
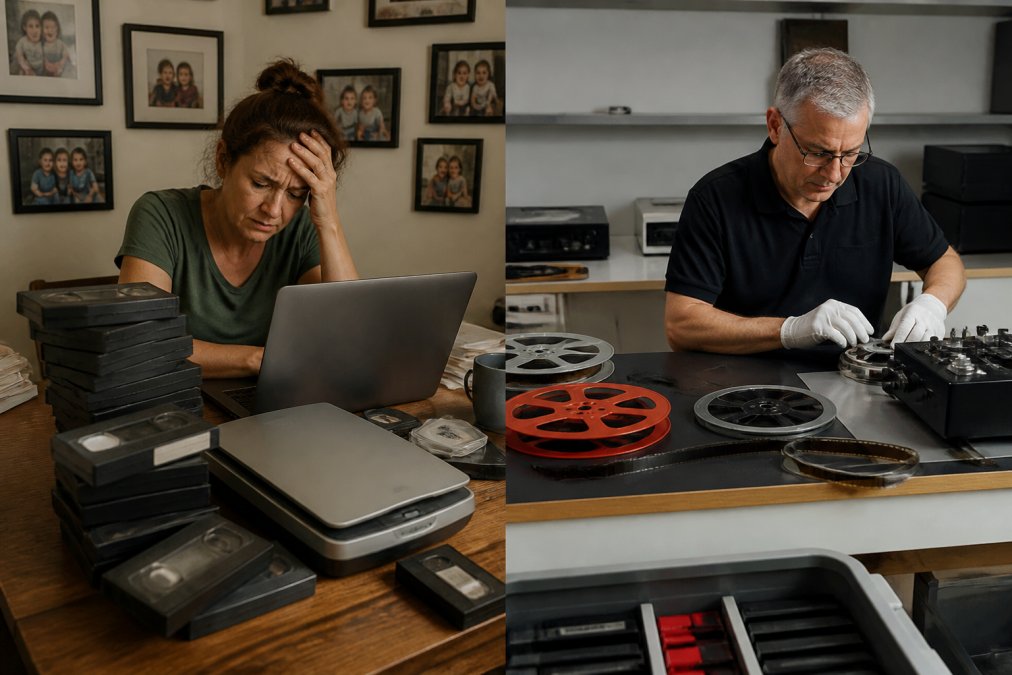
A common approach is to test one or two tapes at home first. If the picture rolls, the audio drops out, or the tape squeals, stop. Those are signs the media needs professional handling, not another playback attempt.
The True Cost of Digitising VHS to Digital
The cost of digitising VHS to digital depends on quantity, tape condition and turnaround, but the honest comparison is not just the invoice. It is the invoice plus your hours.
DIY looks cheap until you price your own time.
| Factor | DIY | Professional |
|---|---|---|
| Upfront cost | Equipment purchase | Per-item pricing |
| Your time | Hours per tape | None |
| Fragile media risk | High | Handled by technicians |
| Equipment quality | Consumer-grade | Professional-grade |
| Turnaround | Weeks of evenings | Often same-day |
Media Conversion Turnaround Times: DIY vs Professional
Media conversion turnaround times are where the gap becomes obvious. A DIY project runs at playback speed at best, so a two-hour tape takes two hours to capture, before editing and encoding. Professional turnaround is measured in days, not weeks, and same-day service is achievable for smaller jobs when the media is in reasonable condition.
The real-time trap
Capture runs at 1x speed for VHS and most consumer formats. A box of 30 two-hour tapes is therefore 60 hours of pure capture time before you factor in setup, rewinding, labelling, encoding and file management. Most people who attempt this finish the first three tapes and stall.
The failure rate nobody prices in
Capture software crashes, dropped frames go unnoticed until playback, and re-doing a tape doubles the time. A common pattern is that roughly one in five tapes from long-term storage needs a second pass, either because the first capture had audio dropouts, or because the tape needed cleaning mid-job.
Minimum viable hardware if you still want to DIY
If you are determined to try a small batch yourself, these are the benchmarks most practitioners treat as the floor for anything you intend to keep long-term:
- Prints and documents: 600 dpi minimum for photos, 300 dpi for text documents, 24-bit colour depth, saved as TIFF rather than JPEG.
- Negatives and slides: 3200 to 4000 dpi optical resolution, 48-bit colour depth, TIFF output. Anything lower will not resolve film grain properly.
- VHS and cassette: an S-Video or component connection where the deck supports it, an external time-base corrector to stabilise the signal, and uncompressed or lossless-compressed capture at 720×576 for PAL sources.
- Audio: 24-bit, 96 kHz WAV for archival masters, with a proper analogue-to-digital converter rather than a 3.5 mm input on a laptop.
If you are preparing a digitised collection as a gift, book the transfer at least a week before the date you need it. Even with same-day options, fragile media sometimes needs a second pass, and you want buffer room.
Quality Comparison: Scanner vs Professional Equipment
A flatbed scanner and a professional transfer rig are built for different jobs. A flatbed scanner is excellent for loose prints and documents, but it cannot read a VHS tape or a film reel at all.
Preservation and Deterioration Prevention
Digital preservation is the practice of storing and maintaining digital files so they remain accessible and uncorrupted over decades. It is not the same as simply having the files on a hard drive.
Never store original tapes in a hot garage, shed or car boot. Heat and humidity accelerate mould growth and binder breakdown, and mouldy tapes can contaminate your playback equipment. If tapes smell like vinegar or show white powder, get them assessed before playing them.
Storage and Backup Solutions for Your Digital Archive
Most guides stop at the scanning process. The harder question is what happens to your files in five, ten and twenty years, because a digitised archive that nobody can find, open or trust is not really preserved.
Digital asset management: the step everyone skips
Digital asset management (DAM) is the practice of organising, describing and maintaining files so they remain findable and usable over time. For a family archive, you do not need enterprise software. You need three habits.
Format migration is not optional
File formats age. The format you choose today may be unreadable in twenty years, not because the file corrupts but because the software to open it disappears. This is called format obsolescence, and it is the reason archival institutions schedule regular format migrations.
For a home archive, the practical rule is:
- Images: keep a TIFF master and a JPEG access copy. TIFF is lossless and widely supported; JPEG is for sharing.
- Video: keep a high-bitrate master in a widely supported container, and a compressed access copy for streaming. Avoid proprietary codecs that only one vendor’s software can decode.
- Audio: keep a WAV master and an MP3 or AAC access copy.
Cloud redundancy without the lock-in
Cloud backup is the third leg of the 3-2-1 rule, but not all cloud storage is equal. Consumer sync services such as Dropbox and Google Drive are convenient but are not archival storage, they sync deletions, and a mistaken delete propagates everywhere.
The accessibility dividend
There is a quieter benefit to doing this properly. A digitised, well-organised archive changes how a family actually uses its memories. Physical boxes in an attic get opened once a decade; a searchable digital archive gets opened at Christmas, at birthdays, at funerals. The preservation work is only worth it if the files are findable when someone actually wants them.
Common Mistakes to Avoid in Media Digitisation
The most expensive mistake is playing a fragile tape to “check if it still works”. Each play can shed oxide and worsen the damage.
Other frequent errors include:
- Storing digitised files on a single drive with no backup
- Choosing low DPI resolution or heavy compression to save space
- Discarding original media after digitising, when it may still hold recoverable detail
- Mixing formats inconsistently, making the archive hard to manage later
- Attempting film reels or negatives on equipment not built for them
Diskbank Alternative for Media Transfer: What to Look For
Choosing a media transfer provider comes down to equipment, turnaround, transparency and care. When comparing options, look past the headline price.
What to check before you hand over irreplaceable family videos:
- Does the provider use professional-grade equipment, not consumer gear?
- Is turnaround confirmed up front, including same-day options?
- Is pricing transparent, with no hidden per-item surprises?
- Can they handle mixed formats such as VHS, film reels, cassettes and vinyl in one job?
- Do they have a track record and real customer feedback you can verify?
If your media is fragile, mixed-format, or emotionally irreplaceable, professional digitization is worth it. If you have a small batch of strong prints and plenty of spare time, DIY can work. Match the approach to the media, not the budget alone.
Frequently Asked Questions
How much does it cost to digitize 1,000 photos?
For 1,000 photos, professional digitisation costs vary based on resolution, restoration needs, and turnaround. DIY scanning requires a high-quality scanner, plus many hours of labour. Professional services often provide bulk rates that can be more economical for large collections, but you should request a personalised quote based on your specific media.
What are the primary risks of attempting DIY media digitisation?
DIY digitisation risks include damaging fragile tapes or film due to improper handling, using equipment that doesn’t support older formats, and producing low-quality scans that miss detail. Without professional-grade gear, you may also struggle with colour correction, dropout, and file format compatibility. Additionally, the time investment can be significant, and mistakes may be irreversible.
How long does professional media conversion take compared to DIY?
Professional media conversion turnaround times can be as fast as same-day for small batches, while larger collections may take a few days. DIY digitisation often takes weeks or months, depending on the number of items and your available time. Professionals use batch processing and high-speed equipment, drastically reducing the hours required per tape or photo.
What equipment is required for high-quality professional digitisation?
High-quality professional digitisation requires professional-grade VHS decks with time-base correction, film scanners with high optical resolution, and software for colour correction and restoration. For photos, a scanner like the Epson Perfection V850 Pro offers superior detail. These tools ensure archival-quality output, but they represent a significant investment for DIYers.
Does professional digitisation include restoration services for damaged media?
Many professional services, including Showbiz Video Productions, offer restoration for damaged media such as mouldy tapes, scratched film, or faded photos. Restoration can involve cleaning, colour recovery, and digital repair. It’s best to ask about restoration options when getting a quote, as not all damage can be fully reversed, but professionals can often salvage more than DIY methods.
Weighing up whether to trust your family’s irreplaceable footage to a home setup is a real decision, and the risk of damaging fragile media rarely justifies the saving. Showbiz Video Productions handles VHS, film reels, cassettes and vinyl with professional-grade equipment, same-day turnaround in most cases, and transparent pricing starting at $6. Get a quote from Showbiz Video Productions and preserve your memories in high-quality digital formats the whole family can enjoy.