
Table of Contents
- Assess and Inventory Your Collection
- Sort Your Media: Chronological vs. Thematic Approaches
- Digitisation and Scanning Processes
- Implement Digital File Naming Conventions
- Add Metadata and Tagging to Your Photos
- How to Store Physical Photographs Long Term
- Cloud Backup and Digital Storage Strategy
- Finding the Best Photo Digitisation Services
Last Updated: August 16, 2026
Assess and Inventory Your Collection
Before digitising or reorganising, understand what you have. Start by gathering everything in one place or a few central locations, checking cupboards, attics, sheds, and drawers for VHS tapes, 8mm film reels, cassette tapes, vinyl records, photo albums, loose photographs, negatives, slides, and other formats.
Create a simple spreadsheet documenting what you find: format, quantity, and condition. Note mould on VHS tapes, water damage on albums, or loose negatives, as this affects prioritisation. Photograph any attached metadata, labels, dates, or notes, before digitisation, as these provide irreplaceable context.
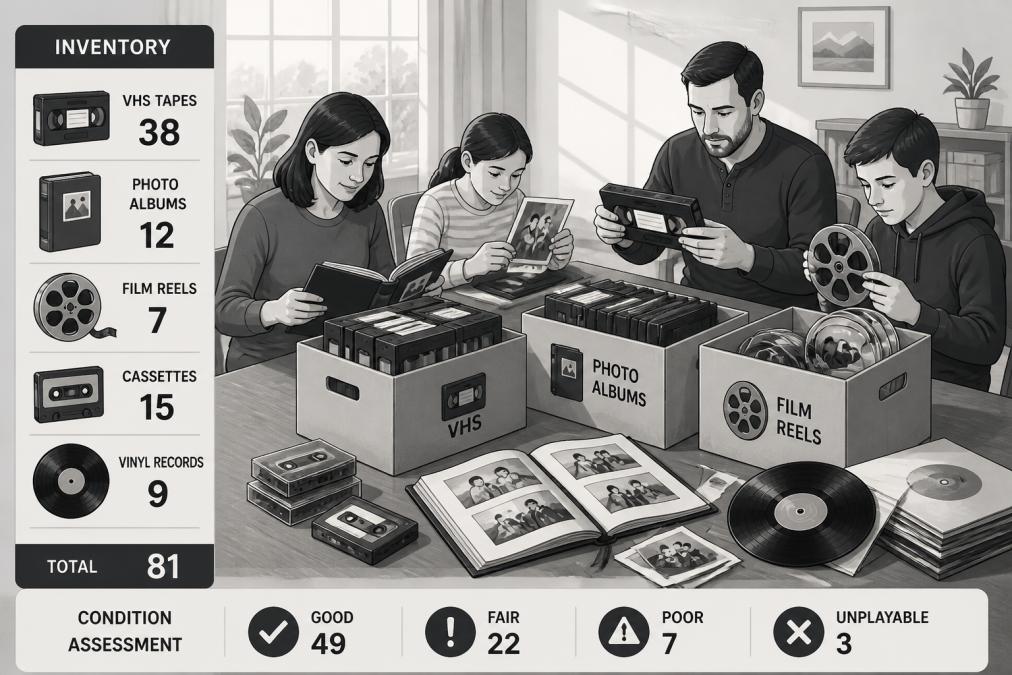
Once you’ve completed your inventory, you’ll know whether you’re dealing with 20 items or 500, determining whether home digitisation or professional services make more sense.
Sort Your Media: Chronological vs. Thematic Approaches
Chronological sorting arranges everything by date, building a visual timeline of your family. It works exceptionally well for family history preservation and allows batch-processing of similar media together, all 1980s VHS tapes digitised at once.
Thematic sorting groups media by subject or event instead of date. This suits people who want to relive specific memories quickly, but requires more decision-making and makes batch-processing harder.
For most families, a hybrid approach works best: sort chronologically as your primary structure to preserve family history logically, but tag items thematically during digitisation. You’ll have both views without duplicating work.
Digitisation and Scanning Processes
Digitisation transforms physical media into digital files that can be stored, shared, and preserved indefinitely.
For photographs and negatives, scanning is the primary method. Home flatbed scanners capture 600-1200 dots per inch, adequate for screen viewing but may not preserve fine detail for large prints. Negative scanning requires specialised equipment; many find professional scanning worthwhile for irreplaceable negatives.
Video formats like VHS, 8mm film, and Hi-8 tapes require increasingly rare playback equipment. Professional digitisation is practical here, as services have the equipment, expertise, and batch-processing capability. They can also stabilise shaky footage, colour-correct faded video, and restore degraded audio.
When digitising at home, invest in quality USB cables and external drives. Poor cables introduce signal degradation, and cheap drives fail unpredictably. The [cost difference is minimal](/cost-of-digitizing-home-movies-2026), but the impact on your final files is substantial.
When to Digitise at Home vs. Professional Services
Home digitisation makes sense for loose photographs in good condition, non-fragile negatives, and media already in digital-adjacent formats. However, irreplaceable media, original negatives, one-of-a-kind film reels, or family videos that exist nowhere else deserve professional handling. Professionals have backup systems, redundancy, and insurance.
Bulk quantities also favour professional services. If you have 200 VHS tapes, the time investment for home digitisation is substantial. Showbiz Video Productions handles multiple formats with same-day turnaround for many jobs, making it practical for extensive collections.
Degraded or damaged media often requires professional intervention. Mouldy VHS tapes, sticky-shed syndrome, or brittle film reels need expert handling. Professionals have cleaning protocols and restoration techniques that home equipment cannot replicate.
Implement Digital File Naming Conventions
How you name digital files determines whether you can find anything later. Effective naming follows a consistent structure: YYYY-MM-DD_Subject_SequenceNumber. For example: 2015-06-20_Birthday_Party_001.jpg. This format sorts chronologically by default, includes context, and prevents duplicate names.
The date component is essential, anchoring every file to a moment in time. The subject should be specific enough to distinguish content but not so detailed that naming becomes tedious. Sequence numbers prevent name collisions when you have multiple photos from the same event.
Avoid special characters, spaces, and unusual punctuation. Use underscores or hyphens instead of spaces. Stick to letters, numbers, hyphens, and underscores to avoid compatibility issues.
File naming conventions matter more than folder structure. If your naming is consistent, you can find files even if folders are disorganised. If naming is chaotic, no folder structure saves you.
For scanned photographs and negatives, include the original format in the filename. Scanned_Negative_1975_Family_Reunion_001 tells you immediately that this came from a negative, not a print.
Add Metadata and Tagging to Your Photos
Metadata is information attached to digital files that describes them: date, location, people, camera settings, and notes. Unlike filenames, metadata is searchable and extensive.
Tagging is the most practical form of metadata. Create consistent tags for people, places, and events. If you tag every photo containing your grandmother as "Grandma_Joan," you can instantly pull up all photos with her, regardless of when they were taken or what folder they’re in.
Location tagging adds another dimension. Tag photos with "Sydney_Harbour," "Family_Home," or specific addresses to search by place and see how locations changed over time.
Digital asset management systems like Adobe Lightroom or similar photo libraries make metadata management practical. You can batch-tag multiple photos, create searchable keyword hierarchies, and build smart collections based on metadata criteria. Even basic photo apps allow tagging and keyword addition.
The investment in metadata pays dividends long-term. Five years from now, you can search your library in seconds instead of scrolling through hundreds of files.
How to Store Physical Photographs Long Term
Even after digitisation, original photographs and negatives deserve proper storage. Originals are irreplaceable, and archival storage preserves them for future generations.
Temperature and humidity are the primary enemies. Fluctuating conditions cause expansion and contraction, damaging emulsion and paper. Stable conditions, ideally around 18-21°C and 30-40% relative humidity, are optimal. Cool, dry interior spaces like a cupboard in a climate-controlled room are far better than basements, attics, or external storage.
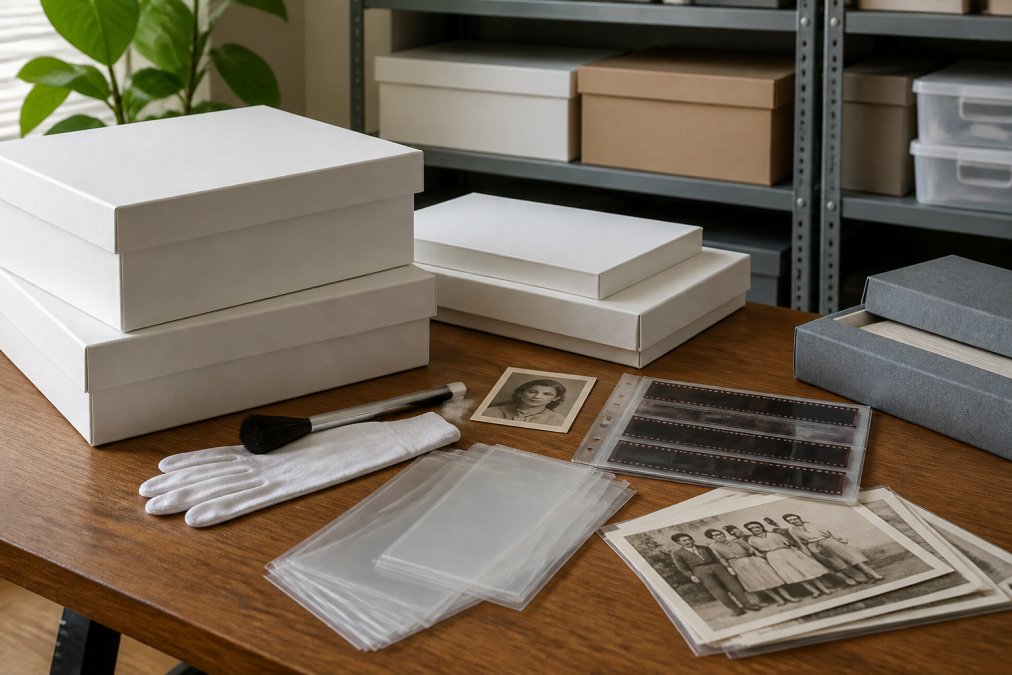
Light exposure causes fading and discolouration. Store photographs in opaque containers, not clear plastic boxes. Acid-free boxes protect against chemical degradation that turns photos yellow and brittle.
Archival Quality Materials and Storage Solutions
Archival-quality materials are specifically designed to preserve photographs. Acid-free boxes, lignin-free tissue paper, and polyester sleeves are standard. These materials don’t contain chemicals that degrade photographs.
Negative sleeves are essential for storing film negatives. Polyester or polypropylene sleeves protect negatives from dust and physical damage while remaining chemically inert. Avoid PVC sleeves, which release chlorine gas over time. Sleeves should be archival-quality and clearly labelled with dates and content.
Photo albums designed for archival storage use acid-free pages and non-adhesive mounting. Avoid old magnetic albums where photos stick to pages with self-adhesive strips. Modern archival albums use sleeves or corners to hold photos without adhesive.
For valuable or irreplaceable photographs, consider individual archival sleeves. These acid-free, lignin-free envelopes protect single photos from environmental damage and physical contact.
Storage location matters as much as materials. A cool, dry cupboard inside your home is far better than a shed, garage, or external storage unit. If you must use external storage, choose climate-controlled facilities that maintain stable conditions year-round.
Cloud Backup and Digital Storage Strategy
Once digitised, your family media files can be lost to hard drive failure, accidental deletion, or device damage. A strong backup strategy ensures your digital memories survive.
The foundation is the 3-2-1 rule: three copies of your data, on two different media types, with one copy stored off-site. This means your original files on your computer, a backup on an external hard drive, and a third copy in cloud storage.
External hard drives are inexpensive and fast. A 4-terabyte drive costs less than $150 and stores thousands of photos and hours of video. Set up automatic backups so you never manually manage the process.
Cloud storage provides off-site backup and accessibility. Services like Dropbox, Google Drive, or Microsoft OneDrive sync your files to their servers, ensuring a copy exists even if your physical devices fail. You can also access your photos from any device with an internet connection.
The key is automation. Set up automatic backups and verify they’re working monthly. Check that your external drive contains recent files and that your cloud storage is syncing correctly.
Never rely on a single backup location. Cloud services go out of business, accounts get hacked, and external drives fail. The 3-2-1 rule exists because redundancy is the only real protection against data loss.
Finding the Best Photo Digitisation Services
If your collection is large, your media is in poor condition, or you lack equipment and time, professional services are your practical solution.
When evaluating services, ask about their equipment and processes. Professional-grade scanners produce higher resolution and better colour accuracy than consumer equipment. Services using professional gear typically produce noticeably better results.
Turnaround time matters. Some services offer same-day turnaround for smaller jobs. Showbiz Video Productions handles multiple formats with same-day service available in most cases, reducing the time your irreplaceable media is away from home.
Ask about handling procedures. How do they store your media while processing? Do they have climate-controlled facilities? What happens if something goes wrong? Reputable services have insurance, backup protocols, and clear procedures for addressing problems.
Pricing should be transparent and reasonable. Services unwilling to quote upfront or suspiciously cheap are warning signs. Compare quotes from multiple services, factoring in reputation and quality alongside cost.
Ask for samples of their work. A professional service should show examples of digitised VHS footage, scanned negatives, or restored photos so you can judge quality.
Check reviews and ask for references. Reviews on Google Local Services or similar platforms provide insight into customer satisfaction. References from people you know carry even more weight.
Consider whether they handle multiple formats. A service handling VHS, 8mm film, cassettes, and vinyl records reduces complexity. Showbiz Video Productions handles this diversity, simplifying the entire process for families with mixed collections.
Ask about file formats and delivery. What format will your digitised files be in? Can you get copies on USB drive, external hard drive, or cloud storage? A service offering options is more flexible.
The best digitisation service balances quality, speed, reliability, and price. It handles your media with genuine care, produces files you’re happy with, and makes the entire process straightforward.
Organising old family media is genuinely worthwhile work. Your photographs, videos, and recordings hold stories that matter to your family. Digitisation ensures these memories survive equipment failure and physical degradation. Whether you digitise at home or work with a professional service like Showbiz Video Productions, the important thing is taking action now. Media degrades every year it sits in storage, so starting today means preserving more of your family’s history. Get a quote from Showbiz Video Productions and see how professional digitisation can transform your collection into something your family can access and enjoy for generations to come.
Frequently Asked Questions
What is the best way to organise old family photos?
Start by sorting your collection into manageable groups, either chronologically by year or thematically by event or family member. Once sorted, digitise the originals using either professional photo digitisation services or a home scanner. Create a consistent digital file naming convention (e.g., YYYY-MM-DD_Event_Description), add metadata tags with names and dates, and store both physical and digital copies safely. This approach preserves your memories while making them easy to find and share.
How do I implement a digital file naming convention for my family media?
Use a structured format that includes the date, subject, and location: YYYY-MM-DD_EventName_Location. For example: 2015-07-04_Birthday_Party_Backyard. Keep names descriptive but concise, avoid special characters, and use underscores or hyphens instead of spaces. Apply this consistently across all digitised files, and document your naming system in a simple text file for reference. This makes searching and sorting thousands of photos manageable and future-proofs your archive.
Should I digitise my family media or keep the originals?
You need both. Physical originals degrade over time due to moisture, temperature changes, and chemical breakdown, especially VHS tapes, film reels, and older photographs. Digitisation creates a backup that lasts indefinitely if stored properly. Keep originals in archival-quality storage in a cool, dry place, and maintain multiple digital copies across external hard drives and cloud storage. This dual approach ensures your memories survive even if one format fails.
What should I look for when choosing a photo digitisation service?
Look for services that use professional-grade equipment, offer transparent pricing, and provide quality guarantees. Check for experience with multiple formats, VHS, film reels, photographs, and vinyl. Ask about their turnaround times and whether they handle metadata or file organisation. Verify they use archival-quality scanning settings (high resolution, appropriate colour depth) and provide files in accessible formats like JPEG or TIFF. Read customer reviews and ask about their backup and security procedures to ensure your irreplaceable media is handled with care.
This article was written using GrandRanker