
Table of Contents
- What You’ll Need Before You Start
- How to Tell If Your 8mm Film Has Mould (and Not Just Dust)
- Signs of Film Degradation: When Cleaning Is No Longer Enough
- Step-by-Step: How to Repair Mouldy 8mm Film Safely
- How to Store 8mm Film Reels to Prevent Mould Returning
- When to Use Professional 8mm Film Digitisation Services
- Common Mistakes to Avoid When Cleaning Mouldy Film
- Frequently Asked Questions
Last Updated: September 13, 2026
What You’ll Need Before You Start
Mould on 8mm film is a biological problem, not a cosmetic one. Left alone, it eats through the emulsion layer that holds your images, and by the time damage is visible it’s usually permanent. This guide from Showbiz Video Productions walks you through how to repair mouldy 8mm film safely at home, and tells you when a reel is past saving.
Before touching a single frame, gather the right kit. The wrong materials cause more damage than the mould itself.
Your materials checklist:
- Isopropyl alcohol, 99% concentration (not rubbing alcohol, which contains water and oils)
- Soft microfibre cloths or lint-free film tissues
- Cotton or nitrile gloves
- P2/N95 respirator mask
- Safety glasses
- A film winder or two reels and a hand-crank viewer
- A clean, well-ventilated workspace away from living areas
- Sealed plastic bags for isolating contaminated reels
Never clean mouldy film in a kitchen, bedroom, or anywhere food is prepared. Mould spores become airborne the moment you unspool a contaminated reel, and they will settle on other surfaces. Work in a garage, shed, or outdoor undercover area with moving air.
How to Tell If Your 8mm Film Has Mould (and Not Just Dust)
Mould on 8mm film looks distinctly different from dust, and the difference determines whether you can save the reel. Mould appears as a white, grey, or pale green powdery bloom that clings to the surface and follows the emulsion pattern; dust sits loosely on top and brushes away in one pass.
Under a bright lamp, mould has a fuzzy, thread-like structure and a faint musty smell, like old basement or wet cardboard. Dust is dry, uniform, and odourless. A vinegar smell is a separate problem: vinegar syndrome, a chemical breakdown of the acetate base that cleaning cannot reverse.
A common mistake is assuming a hazy reel just needs a wipe. Mildew feeding on the gelatin emulsion for months leaves etching, a permanent pitting of the surface. You won’t know how deep it goes until you clean a test section and hold it to the light.
Signs of Film Degradation: When Cleaning Is No Longer Enough
Cleaning saves film with surface mould but does nothing for film that has already chemically degraded. Understanding the signs of film degradation helps you decide whether to clean or hand the reel to a professional.
Watch for these red flags:
- Vinegar smell: the acetate base is breaking down. This is irreversible and contagious to other reels.
- Warping or cupping: the film no longer lies flat and will jam a projector.
- Brittleness: the film snaps when gently flexed rather than bending.
- Colour fade or magenta shift: dye layers are deteriorating.
- Sticky or gummy surface: the binder holding the emulsion is failing.
If you spot two or more of these, stop. Aggressive cleaning accelerates the damage. The reel needs stabilisation and controlled transfer, not a cloth and alcohol.
Store suspect reels in a sealed bag with a silica gel packet while you decide what to do. This slows further moisture-driven mould growth and stops spores spreading to your healthy reels in the meantime.
Step-by-Step: How to Repair Mouldy 8mm Film Safely
Repairing mouldy 8mm film is slow and methodical. Rushing risks scratching the emulsion or spreading spores. Order matters: isolate first, clean the film second, clean the equipment third, because a dirty projector or scanner gate will re-contaminate a reel the moment it passes through.
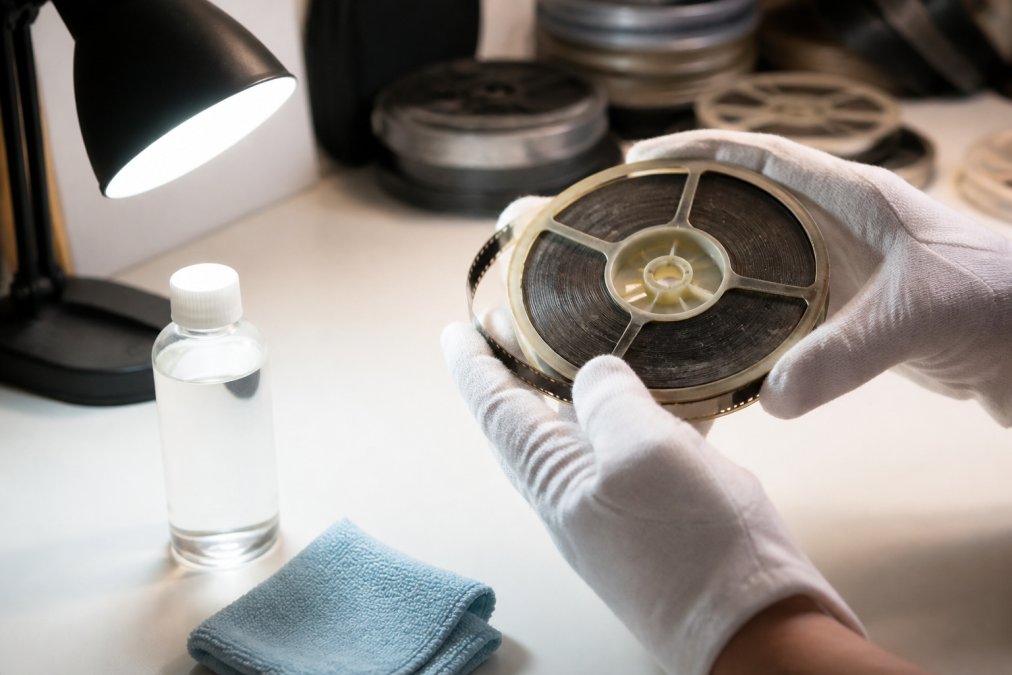
Step 1: Set Up a Clean, Ventilated Workspace
Choose a space with good airflow and no carpet, which traps spores. Lay down a disposable sheet you can bin afterwards. Put on your mask, gloves, and glasses before opening any film can. [Time: 10 minutes]
Expected result: A dedicated, contained work zone where contamination stays put.
Step 2: Inspect and Isolate Affected Reels
Open one reel at a time. Check the leader and outer windings first, since mould usually starts at the edges where moisture collects. Bag any reel showing active mould immediately, away from clean reels. [Time: 5 minutes per reel]
Expected result: Contaminated reels separated from healthy stock.
Step 3: Clean the Film with Isopropyl Alcohol
Isopropyl alcohol at 99% is the standard film cleaner for mould because it evaporates fast and doesn’t leave residue. Dampen a microfibre cloth, not soak it. Wind the film slowly past the cloth using a film winder, applying light, even pressure. Work in short sections and swap cloths often. [Time: 20-40 minutes per reel]
Expected result: Visible mould bloom lifts away and the film runs clean.
Step 4: Dry, Rewind, and Rehouse the Film
Let the cleaned film air-dry fully before rewinding, since trapped solvent can damage the emulsion. Rewind onto a clean, archival reel and store it in a fresh can with a silica packet. [Time: 15 minutes]
Expected result: A dry, mould-free reel in clean housing.
Step 5: Clean the Projector or Scanner Path Before You Run the Film
This is the step most guides skip, and it’s why reels go mouldy again within weeks. Every time a contaminated reel passes through a projector gate, telecine transport, or scanner film holder, spores and debris transfer onto the rollers, pressure plate, gate aperture, and film channel. Run a clean reel through that path afterwards and you re-seed it.
Before running any cleaned reel, service the equipment:
- Projector gate and pressure plate: remove the lens and gate assembly if your model allows. Wipe the gate aperture, film channel, and pressure plate with a microfibre swab dampened with 99% isopropyl alcohol. Pay attention to the gate corners, where debris collects.
- Rollers and sprockets: inspect rubber or plastic rollers for a grey film of mould residue. Wipe each one, rotate it, and wipe the hidden side. Replace any roller that has gone tacky or cracked, since it sheds particles onto the film.
- Scanner film path: on a flatbed or dedicated film scanner, clean the glass, film holder, and any transport rollers with the same alcohol-dampened swab. Let everything flash off before loading film.
- Lens and light path: dust the lens with a blower bulb, not a cloth, and check the lamp housing for mould if the projector has been stored damp.
Keep a dedicated ‘dirty’ winder and a dedicated ‘clean’ winder. Once a winder has touched a mouldy reel, use it only on reels still being cleaned, never on finished stock. Label them so nobody mixes them up.
Expected result: A film path that will not re-contaminate a cleaned reel on its first pass.
Step 6: Run a Test Pass and Inspect the Result
Before committing a whole reel, run a short test section through the cleaned path and inspect it under a bright lamp. Look for three things: whether the mould bloom lifted cleanly, whether etching remains as a dull patch where the emulsion was eaten, and whether the film runs without snagging. If active mould remains, repeat Step 3 with a fresh cloth rather than pressing harder. If it shows etching, the damage is permanent and further cleaning only thins the emulsion.
Expected result: Confirmation that the reel is clean enough to digitise, or a clear signal that it needs professional stabilisation instead.
Do not run a mouldy reel through a projector ‘just to see what’s on it’ before cleaning. The heat from the lamp and the friction of the gate push spores into the air and embed mould debris into the film channel, which then contaminates every reel you run afterwards.
How to Store 8mm Film Reels to Prevent Mould Returning
The best way to store 8mm film reels is cool, dry, and dark, because mould needs humidity above roughly 60% to grow. Get storage right and you remove the problem at its source. But storage is only half the job: a mouldy rag left in a bin liner in the shed will re-seed spores onto everything nearby.
Storage Conditions That Starve Mould
Keep reels upright, not stacked flat, so air moves around each can. Aim for a stable temperature and relative humidity between 30% and 50% (nfsa.gov.au). Avoid garages that swing between damp winters and hot summers, and never store film in a roof space, where heat accelerates degradation.
| Storage Factor | Ideal Condition | Why It Matters |
|---|---|---|
| Temperature | Cool and stable | Heat speeds up acetate breakdown |
| Humidity | 30-50% relative | Below 60% starves mould |
| Light | Dark storage | Prevents dye fading |
| Position | Upright on shelves | Allows airflow, reduces pressure |
| Container | Archival can plus silica | Blocks moisture and spores |
Check stored reels once or twice a year. Catching a faint musty smell early saves the whole collection. Swap silica gel packets when they lose their crunch, since a saturated packet stops absorbing and can release moisture back into the can.
Disposing of Contaminated Materials Safely
This is the part almost no guide covers, and it’s where cross-contamination actually happens at home. Everything that has touched an active mould reel is now a spore source: cloths, swabs, gloves, the disposable sheet, the plastic bags used to isolate reels, and any reel or can you decide not to keep.
Handle disposal in this order:
- Bag it at the point of use. Don’t carry a used cloth across the room to a bin. Keep a sealable plastic bag beside your work zone and drop each cloth, swab, and glove into it as you finish. Seal it before you move it.
- Double-bag reels you are discarding. A mouldy reel you won’t clean should go into a sealed bag, then a second sealed bag, before it leaves the work area. This stops spores escaping on the way to the bin.
- Do not put mouldy film or cloths in general recycling. Recycling streams are sorted by hand and machinery, and contaminated film and cloths don’t belong in them. Seal them and place them in general waste.
- Do not burn mouldy film. Celluloid and acetate bases are not safe to burn domestically, and burning releases irritant compounds. Bag and bin it instead.
- Wipe down surfaces and tools afterwards. Once the bags are sealed and out of the work area, wipe the bench, winder, reels you’re keeping, and any tools with a cloth dampened with 99% isopropyl alcohol. Let everything flash off, then wash your hands and forearms thoroughly.
- Change your clothes before entering living areas. Spores settle on fabric. If you’ve been working in a shed or garage, change out of your work clothes before going back inside, and wash them separately from household laundry where practical.
A common pattern: people clean a reel successfully, store it correctly, then find mould back on it six months later because the winder or storage shelf was never cleaned. Treat the whole work zone, not just the film, as contaminated until you’ve wiped it down.
Dispose of used cloths, gloves, disposable sheets, and discarded reels in sealed bags placed in general waste, never recycling. Wipe down every tool and surface that touched the mouldy reel before you store your clean film, and change out of work clothes before re-entering living areas. Mouldy materials left lying around will re-seed spores onto anything nearby.
When to Use Professional 8mm Film Digitisation Services
Professional 8mm film digitisation services are worth it when a reel shows active mould across the full length, when the base is degrading, or when you don’t have the equipment to run the film safely. Cleaning is only half the job. The film still needs transferring before it degrades further, which requires a working projector or telecine setup most households no longer own.
At Showbiz Video Productions, we’ve handled ageing home movie collections for over 20 years, including reels families assumed were beyond saving. Our team uses professional-grade equipment to clean, stabilise, and digitise film without adding scratches or static damage, with same-day turnaround in most cases. If you’re weighing up whether to clean a reel yourself or hand it over, our team can advise on the safest path.
National Film and Sound Archive guidance on caring for film collections is a useful reference for understanding how storage conditions affect long-term preservation.
Common Mistakes to Avoid When Cleaning Mouldy Film
Most ruined reels aren’t lost to mould. They’re lost to over-enthusiastic cleaning. Here are the errors that cause the most damage.
- Using water or household cleaners. Water feeds mould and swells the emulsion. Stick to 99% isopropyl alcohol.
- Scrubbing hard. Mould sits on the surface; the emulsion underneath is delicate. Light, repeated passes beat heavy pressure.
- Cleaning in a closed room. You’ll inhale spores and contaminate everything nearby.
- Skipping gloves and a mask. Mould spores are a genuine respiratory irritant (healthdirect.gov.au).
- Cleaning a degraded reel. If the base is failing, cleaning makes it worse.
- Rewinding wet film. Solvent trapped between windings damages the emulsion.
- Mixing contaminated and clean reels. Cross-contamination spreads mould through the collection.
Dispose of used cloths, gloves, and disposable sheets in a sealed bag. Mouldy materials shouldn’t go into general recycling, and contaminated cloths left lying around will re-seed spores onto anything nearby.
Mouldy 8mm film is a race against time. Every week a contaminated reel sits in a warm cupboard, the emulsion loses a little more of the image you’re trying to save. If you’re unsure whether your reels are salvageable, or you’d rather not risk them, Showbiz Video Productions can help. We offer professional-grade cleaning and digitisation, same-day turnaround in most cases, transparent pricing, and over 20 years of experience handling irreplaceable family memories. Get a quote from Showbiz Video Productions and give your film a safe, lasting digital future.
Frequently Asked Questions
Can 8mm film with mould still be restored?
Yes, in many cases. If the mould is surface-level and the emulsion hasn’t been eaten through, careful cleaning with isopropyl alcohol and a soft microfiber cloth can remove it. However, if the film base has warped, the emulsion is flaking, or a vinegar smell is present, the damage is likely irreversible. In those cases, professional 8mm film digitisation services can often recover more than home methods because they use calibrated equipment and controlled environments.
Is it safe to handle mouldy 8mm film reels at home?
Mould spores can trigger allergies and respiratory issues, so you should take precautions. Work in a well-ventilated area, wear nitrile gloves and a P2 respirator mask, and avoid dry-brushing the film, which sends spores into the air. Clean the workspace with a damp cloth afterwards. If you have asthma or a compromised immune system, have the reels assessed by a professional rather than handling them yourself.
What causes mould to grow on 8mm film?
Mould needs moisture, warmth, and darkness. Storing film reels in garages, sheds, or damp cupboards creates ideal conditions. The acetate base and gelatin emulsion are organic materials that mould can feed on. Once spores land on the film, high humidity above 60% lets them colonise the surface. Keeping reels in a cool, dry place with silica gel packs and good airflow is the simplest way to prevent regrowth.
Can I play mouldy 8mm film in a projector?
No. Running mouldy film through a projector spreads spores through the machine, scratches the emulsion, and can permanently damage both the film and the projector. Clean the film first, inspect it frame by frame, and only project it once the surface is clear. If the film is brittle or has heavy mould, have it digitised instead of projected, which avoids mechanical stress entirely.