
Table of Contents
- Professional Equipment for Film Transfer: What You Need to Know
- Film Scanning Methods: Frame-by-Frame vs Projection Transfer
- Understanding Resolution Standards and Optical Quality
- Digital File Formats for Home Movies and Archival Storage
- Cost to Convert Old Home Videos: What Affects Pricing
- Colour Correction and Digital Restoration Processes
- Choosing Between Professional Services and DIY Equipment
- Conclusion
- Frequently Asked Questions
Last Updated: September 3, 2026
Professional Equipment for Film Transfer: What You Need to Know
Converting aging film reels and home videos into digital formats requires understanding the professional equipment for film transfer that separates quality results from mediocre ones. The choice between different scanning technologies, resolution standards, and restoration methods directly determines whether your family memories survive with clarity and colour accuracy or degrade into unwatchable digital files.
At Showbiz Video Productions, we’ve spent over 20 years working with the full spectrum of film transfer equipment, and the differences matter far more than most people realise. This guide breaks down the actual technology, not the marketing claims, so you can understand what professional-grade equipment does and why it costs what it does.
The real problem isn’t finding someone willing to digitise your media. It’s finding someone with equipment that won’t destroy irreplaceable footage in the process.
Film Scanning Methods: Frame-by-Frame vs Projection Transfer
Frame-by-frame scanning captures each individual film frame using a CCD or CMOS sensor, while projection transfer shines light through the film onto a video camera. These two approaches produce dramatically different results, and understanding the distinction is essential when evaluating professional equipment for film transfer.
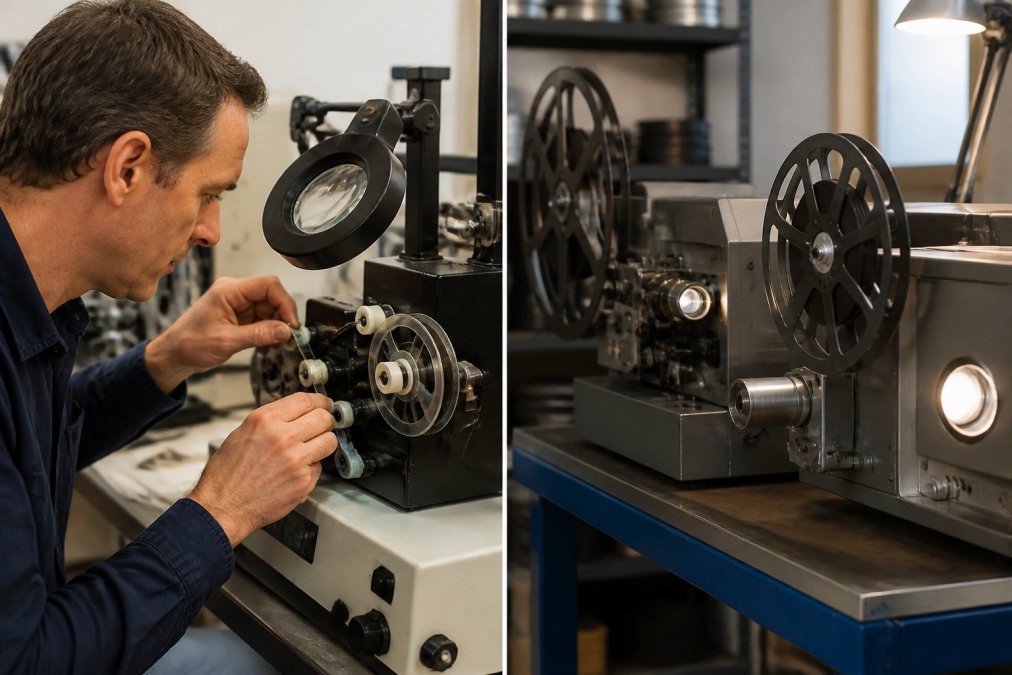
Frame-by-Frame Scanning Technology
Frame-by-frame scanning represents the gold standard for archival-quality digitisation. The equipment uses an optical resolution sensor to capture each individual frame at full resolution before advancing to the next. This method eliminates flicker and motion artifacts because the film never moves during exposure. The scanner reads the film’s dynamic range completely, preserving shadow detail and highlight information that projection methods often lose.
The equipment required is expensive, professional frame scanners cost between several thousand and tens of thousands of pounds, but they deliver optical resolution that matches or exceeds the original film stock’s capability. A 2K or 4K scanner can extract every detail from 8mm, Super 8, or 16mm film. The CCD sensors used in quality equipment are less susceptible to heat drift than CMOS alternatives, maintaining colour accuracy across long scanning sessions.
Setup requires careful calibration. The scanner must be aligned so the film sits perfectly flat in the optical path. Perforation damage on old film can cause registration errors, the frame position shifts slightly between frames, and professional equipment includes image stabilisation to compensate. The scanner also controls exposure automatically, adjusting for film stock variations and fading.
Processing happens in real time. A single 8mm film reel (typically 120 metres) takes 45 minutes to scan at 2K resolution (smpte.org). The raw footage emerges as uncompressed or lightly compressed video, ready for post-production work.
Projection Transfer Method
Projection transfer points a video camera at a screen or translucent surface where the film is projected. The method is faster and cheaper, equipment costs a few hundred to a few thousand pounds, but sacrifices quality for speed. Flicker becomes a persistent problem because the camera captures the film at different points in the projector’s light cycle. The dynamic range captured is limited to what the camera sensor can see, often clipping shadows or highlights.
Aspect ratio issues emerge frequently. The film’s actual frame size may not match the camera’s sensor dimensions, forcing choices about cropping or letterboxing. Colour grading becomes necessary because projection introduces colour casts from the projector’s light source.
The speed advantage is real, a reel scans in 15-20 minutes, but the quality trade-off is permanent. Once footage is transferred via projection, you cannot recover lost detail or correct flicker in post-production.
Understanding Resolution Standards and Optical Quality
Professional equipment for film transfer must deliver resolution that preserves the film stock’s original information. This is where specifications matter more than marketing language.
Standard definition (SD) at 720×480 resolution captures roughly 30% of the detail present in 8mm or Super 8 film (smpte.org). High-definition (1920×1080) captures approximately 70%. 2K scanning (2048×1536) approaches 95% of the film’s original optical information. 4K (4096×2160) exceeds the detail most 8mm film contains, but remains valuable for 16mm stock and archival preservation.
Optical resolution, what the scanner’s lens and sensor can actually resolve, differs from output resolution. A 4K scanner with poor optics delivers soft, unclear 4K video. Professional equipment uses multi-element optical designs with anti-reflective coatings and precise focus mechanisms. The sensor must have sufficient pixel density to capture the film’s grain structure without interpolation.
Bit depth affects colour accuracy. 8-bit colour (256 levels per channel) is the minimum for acceptable results. 10-bit colour (1024 levels) preserves subtle gradations, especially in skin tones and skies. Professional archival work uses 10-bit or higher to maintain colour information through post-processing workflows.
Frame rate conversion introduces another layer of complexity. 8mm film typically runs at 18 frames per second; Super 8 at 18 or 24 fps; 16mm at 24 fps. Converting to standard video (25 fps for PAL, 29.97 fps for NTSC) requires interpolation or frame duplication. Professional equipment includes intelligent frame rate conversion that minimises motion artifacts.
Digital File Formats for Home Movies and Archival Storage
MP4 is the most accessible format, it plays on any device and compresses efficiently, but it’s a lossy codec that discards information permanently. For viewing and sharing, MP4 works well. For archival and future editing, it’s inadequate because the compression cannot be reversed.
MOV files use the same codec technology as MP4 but in Apple’s container format. Professional equipment often outputs MOV because it preserves more metadata and integrates with editing software like Final Cut Pro.
ProRes is the professional standard for post-production workflows. ProRes 422 HQ maintains high quality while compressing to manageable file sizes. A 2-hour film reel produces roughly 500 gigabytes in ProRes, compared to 50 gigabytes in MP4. The codec is reversible, you can re-encode ProRes without quality loss.
DNxHD serves the same function in Windows environments, offering professional-grade compression with full editability.
For true archival preservation, uncompressed or lightly compressed formats are superior. A single 8mm reel stored as uncompressed video occupies 2-3 terabytes, making this approach impractical for most families. A middle ground uses lossless or visually lossless codecs like ProRes or DNxHD, which compress to 5-10% of uncompressed size while preserving all visible detail.
The codec choice also affects colour grading flexibility. MP4’s 8-bit colour space limits correction options. 10-bit ProRes allows sophisticated colour work without banding or posterisation.
Cost to Convert Old Home Videos: What Affects Pricing
Several factors determine the actual cost to convert old home videos, and understanding them prevents surprises.
Film condition is the primary cost driver. Acetate-base film from the 1950s-1980s frequently suffers vinegar syndrome, chemical degradation that produces a visible white crystalline coating and a distinctive vinegar smell (loc.gov). Polyester-base film from the 1980s onward is more stable but still subject to colour fading and brittleness. Severely damaged film requires cleaning, splicing, and sometimes frame-by-frame inspection to catch breaks. A reel in poor condition takes 2-3 times longer to process than pristine stock.
Reel capacity affects throughput. Standard 8mm reels hold 120 metres (roughly 30 minutes of film). Larger reels hold more footage per reel, reducing per-minute costs. A single reel costs less to process than ten 120-metre reels with the same total footage because setup time is amortised across more content.
Resolution choice scales costs directly. SD scanning costs less than HD, which costs less than 2K, which costs less than 4K. The difference reflects both equipment capability and processing time, 4K scanning takes longer and requires more powerful computers for colour correction.
Colour correction and digital restoration add significant value but increase cost. Basic colour grading, removing colour casts and balancing exposure, is often included. Advanced restoration, removing scratches, dust, and film grain, requires manual work or specialised software and increases pricing substantially.
Turnaround time affects cost structure. Same-day service requires dedicated equipment and staff availability, commanding a premium. Standard turnaround (5-7 business days) allows batching and more efficient resource allocation, reducing per-unit cost.
At Showbiz Video Productions, we price transparently based on these factors. Your specific reel condition, format, desired resolution, and timeline determine the final quote. The starting point reflects the simplest scenario, clean film, standard resolution, normal turnaround, but most projects involve additional considerations.
Colour Correction and Digital Restoration Processes
Raw scanned footage rarely looks perfect. Colour correction and restoration transform it into something watchable and archival-quality.
Colour grading addresses the most visible issues first: faded colours, colour casts, and exposure problems. Old film stock fades predictably. Reds fade faster than greens, which fade faster than blues, leaving footage with a cyan or magenta tint. Professional colour grading uses curves and colour wheels to restore balance. A skilled colourist can recover remarkable detail from severely faded footage by adjusting individual colour channels.
Exposure correction compensates for inconsistent lighting or camera exposure during filming. Scenes shot in bright sunlight often overexpose, clipping highlights. Indoor footage frequently underexposes, losing shadow detail. Professional equipment includes exposure control tools that recover information from the edges of the histogram without introducing noise.
Digital restoration removes physical damage. Scratches appear as lines running vertically through the frame. Dust creates small spots. Splices, where broken film was rejoined, create visible jumps. Professional restoration software uses temporal analysis, comparing adjacent frames to identify and remove artifacts. Frame-by-frame restoration is manual but guarantees results; automated restoration is faster but sometimes leaves visible traces.
Film grain is a stylistic choice. Some prefer the original grain structure preserved for authenticity. Others want grain reduction for a cleaner look. Professional equipment includes grain reduction algorithms that preserve detail while smoothing noise, a balance that requires careful calibration.
Flicker correction addresses the projection transfer problem. When video captures film at inconsistent light levels, brightness flickers between frames. Professional software detects and corrects this by smoothing brightness across the timeline.
The post-production workflow matters. Scanning at 10-bit colour provides more information for correction than 8-bit. Uncompressed or lightly compressed intermediates preserve detail through multiple processing steps. Final delivery in a compressed format like MP4 is acceptable for viewing, but archival masters should remain in professional formats.
Choosing Between Professional Services and DIY Equipment
The decision between hiring professionals and purchasing your own equipment hinges on volume, budget, and acceptable quality levels.
DIY equipment ranges from a few hundred pounds for basic projection setups to several thousand for decent frame scanners. A consumer-grade film scanner (roughly £800-2,000) produces acceptable results for personal viewing but falls short of archival standards. The optical resolution is limited. Colour accuracy is inconsistent. Noise levels are higher. For a handful of reels, this trade-off might be acceptable. For a large collection, the cumulative quality loss becomes noticeable.
Professional equipment costs £5,000-£15,000 for entry-level frame scanners and £20,000-£50,000+ for broadcast-quality systems. This investment makes sense only if you’re processing hundreds of reels or offering services commercially. The equipment requires regular maintenance, sensor cleaning, optical alignment, software updates, adding ongoing costs.
Time is the hidden cost of DIY. Processing a single 8mm reel takes 1-2 hours with consumer equipment, including setup, scanning, and basic colour correction. A 20-reel collection represents 20-40 hours of work. Professional labs batch reels, amortising setup time. A technician can process 10-15 reels in an 8-hour shift.
Quality consistency is difficult to achieve solo. Professional operators develop an eye for optimal exposure and colour balance. They know which film stocks respond to which correction techniques. They catch problems, splices, breaks, severe fading, that require special handling. A single mistake on irreplaceable footage is permanent.
Showbiz Video Productions handles the technical complexity and equipment investment so you don’t have to. We maintain professional-grade scanning equipment calibrated to archival standards. Our technicians have processed thousands of reels and understand how different film stocks behave. We deliver results in formats suitable for both immediate viewing and long-term preservation. For most families, professional service is the sensible choice.
The DIY route makes sense only if you have significant technical knowledge, substantial volume to justify equipment investment, or you accept lower quality as the trade-off for ownership and control.
Conclusion
Professional equipment for film transfer represents a significant investment, but the alternative, losing irreplaceable family memories to further degradation, is far costlier. Understanding the difference between frame-by-frame scanning and projection transfer, recognising resolution standards that actually preserve your film’s original detail, and knowing what colour correction can and cannot fix ensures you make an informed choice about how your footage is handled.
Showbiz Video Productions combines professional-grade scanning equipment, expert technicians, and transparent pricing to deliver archival-quality results. Whether your collection sits in boxes gathering dust or you’re concerned about acetate degradation, we handle the technical complexity with the care your memories deserve. Get a quote today and discover how affordable professional film transfer can be.
=== FAQ ANSWERS (audit these too, same rules) ===
[1] Q: What is the difference between frame-by-frame scanning and projection transfer?
A: Frame-by-frame scanning uses a CCD or CMOS sensor to capture each individual frame at high optical resolution, delivering superior detail and dynamic range. Projection transfer shines light through the film onto a camera sensor, which is faster but captures less detail. Frame-by-frame scanning is the industry standard for archival-quality digitisation because it preserves the original film grain and colour information with greater precision, making it ideal for precious family memories you want to preserve for generations.
[2] Q: How much does it cost to convert old home videos to digital format?
A: The cost to convert old home videos depends on several factors: the number of reels or tapes, film condition, desired resolution (SD, HD, 2K, or 4K), and turnaround time. Degraded film or tape may require additional restoration work, which affects pricing. Professional services typically charge per hour or per reel, with transparent pricing structures. For an accurate quote tailored to your specific collection, contact a professional service to discuss your materials and requirements.
[3] Q: Why should I use professional-grade equipment instead of buying my own?
A: Professional-grade equipment, including high-end CCD sensors, precision film transports, and colour grading tools, costs thousands to tens of thousands of pounds and requires specialised training to operate. Professional technicians calibrate equipment to industry standards, handle fragile media safely, and perform post-production restoration that DIY equipment cannot match. For irreplaceable family videos, professional services eliminate the risk of damage and deliver archival-quality results you cannot achieve at home.
[4] Q: What digital file formats should I expect when my videos are digitised?
A: Professional digitisation typically delivers files in formats like MP4, MOV, or ProRes, depending on your intended use. MP4 offers good compatibility across devices and streaming platforms. MOV works seamlessly with Apple systems. ProRes is preferred for archival storage and professional editing because it maintains higher bit depth and bitrate. Ask your service provider which formats they offer and which best suits your needs, whether you want to watch on modern devices, share with family, or preserve for long-term archival storage.
Frequently Asked Questions
What is the difference between frame-by-frame scanning and projection transfer?
Frame-by-frame scanning uses a CCD or CMOS sensor to capture each individual frame at high optical resolution, delivering superior detail and dynamic range. Projection transfer shines light through the film onto a camera sensor, which is faster but captures less detail. Frame-by-frame scanning is the industry standard for archival-quality digitisation because it preserves the original film grain and colour information with greater precision, making it ideal for precious family memories you want to preserve for generations.
How much does it cost to convert old home videos to digital format?
The cost to convert old home videos depends on several factors: the number of reels or tapes, film condition, desired resolution (SD, HD, 2K, or 4K), and turnaround time. Degraded film or tape may require additional restoration work, which affects pricing. Professional services typically charge per hour or per reel, with transparent pricing structures. For an accurate quote tailored to your specific collection, contact a professional service to discuss your materials and requirements.
Why should I use professional-grade equipment instead of buying my own?
Professional-grade equipment, including high-end CCD sensors, precision film transports, and colour grading tools, costs thousands to tens of thousands of pounds and requires specialised training to operate. Professional technicians calibrate equipment to industry standards, handle fragile media safely, and perform post-production restoration that DIY equipment cannot match. For irreplaceable family videos, professional services eliminate the risk of damage and deliver archival-quality results you cannot achieve at home.
What digital file formats should I expect when my videos are digitised?
Professional digitisation typically delivers files in formats like MP4, MOV, or ProRes, depending on your intended use. MP4 offers good compatibility across devices and streaming platforms. MOV works seamlessly with Apple systems. ProRes is preferred for archival storage and professional editing because it maintains higher bit depth and bitrate. Ask your service provider which formats they offer and which best suits your needs, whether you want to watch on modern devices, share with family, or preserve for long-term archival storage.
This article was written using GrandRanker