
Table of Contents
- What You’ll Need to Convert Vinyl Records to Digital Files
- How to Clean Vinyl Records for Digitisation
- Step-by-Step: How to Convert Vinyl Records to Digital Files
- Best Vinyl to Digital Converter Options
- WAV vs MP3 for Vinyl Transfers
- Post-Processing and Audio Restoration
- Storage, Backup, and Legal Considerations
- Common Mistakes to Avoid
- Frequently Asked Questions
Last Updated: September 23, 2026
What You’ll Need to Convert Vinyl Records to Digital Files
You can convert vinyl records to digital files with a turntable, a phono preamplifier, an analog-to-digital converter, and recording software. Most people already own half of this setup. This guide walks through the full process, from cleaning to file storage, so nothing gets lost along the way.
The basic kit breaks down like this:
- Turntable with a working stylus and RCA cables
- Phono preamplifier (built in or separate) to lift the signal to line level
- USB interface or ADC to turn analog sound into digital data
- Recording software on a computer or laptop
- A clean, stable surface away from speakers and vibrations
If your turntable has a USB output, you can skip the separate preamp and interface. If it only has RCA outputs, you need both.
Check your turntable’s manual before buying anything. Many modern decks have a switchable phono preamp built in, which saves you a purchase and one more cable to troubleshoot.
How to Clean Vinyl Records for Digitisation
Clean vinyl is the single biggest factor in how good your final recording sounds. Dust and grit sit in the groove and get picked up as surface noise, clicks and pops that no software can fully remove later.
A simple cleaning routine:
- Mix a few drops of mild dish soap with distilled water.
- Wipe along the groove with a soft carbon-fibre brush, not across it.
- Rinse with distilled water and let the record air dry.
- Use an anti-static brush right before playback.
For heavy grime, a vacuum-based record cleaning machine does a deeper job. It costs more, but it lifts dirt out of the groove rather than pushing it around.
Never use tap water or paper towels. Tap water leaves mineral residue in the groove, and paper towels shed fibres that create permanent surface noise on the next play.
Step-by-Step: How to Convert Vinyl Records to Digital Files
The full process takes about 20 to 30 minutes per record once your setup is running. Here are the three stages that matter most.
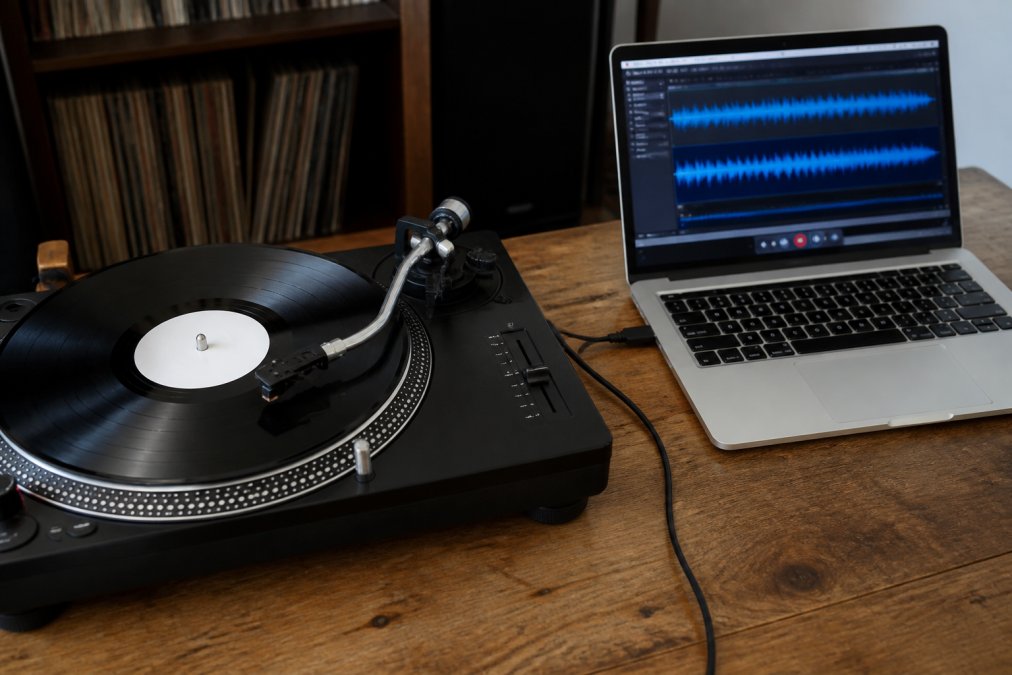
Step 1: Connect Your Turntable to Your Computer
Plug your turntable’s RCA cables into the phono preamplifier, then run the preamp into your USB interface or ADC. Connect that to your computer and let the operating system detect it.
A few things to check:
- Set your input device in the recording software to the correct interface
- Keep cables away from power supplies to avoid a ground loop hum
- Confirm the turntable is set to the right speed (33 or 45 rpm)
Step 2: Set Your Levels and Record
Play the loudest part of the record first and set your input gain so peaks sit around -6 dB. This headroom protects against clipping without losing detail.
Then rewind, press record, and drop the needle. Record the whole side in one pass. Splitting later is easier than stopping and starting.
Step 3: Split Tracks and Add Metadata
Once the side is recorded, split it into individual tracks in your software. Add metadata like artist, album, year, and track number using ID3 tags, so the files sort correctly on any device.
Record the full side first, then split. Stopping between tracks risks clipping the first note and adds gaps that are hard to fix.
Best Vinyl to Digital Converter Options
The best vinyl to digital converter depends on how much you plan to digitise. For a handful of records, a USB turntable and free software will do the job. For a whole collection, a dedicated ADC and paid software give you more control.
| Setup | Best For | What You Need | Effort |
|---|---|---|---|
| USB turntable + free software | A few records | One cable, no extra gear | Low |
| Turntable + preamp + USB interface | Regular transfers | Three cables, level control | Medium |
| Turntable + preamp + dedicated ADC | Full collections | Studio-grade signal chain | High |
| Professional conversion service | Irreplaceable or fragile records | Nothing, just hand it over | None |
If your records are rare, warped, or you simply do not want to risk damaging them, a professional service handles the whole job. Showbiz Video Productions converts vinyl and other legacy formats using professional-grade equipment, with same-day service in most cases.
WAV vs MP3 for Vinyl Transfers
WAV is the better choice for vinyl transfers because it keeps every bit of the original recording. MP3 throws away data to shrink the file, and once that data is gone, you cannot get it back.
Here is how the formats compare for this job:
- WAV: lossless, large files, ideal for archival quality
- FLAC: lossless, roughly half the size of WAV, good for storage
- MP3: lossy, small files, fine for casual listening only
Record at 24-bit depth and a 96 kHz sampling rate if your interface allows it. You can always make MP3 copies later for your phone or car.
Keep your WAV or FLAC masters untouched. Make MP3 copies as a second set for everyday listening, so the originals stay pristine.
Post-Processing and Audio Restoration
Post-processing is where a rough transfer becomes something you actually want to listen to. This step is where most guides stop, but it is the difference between a usable file and a noisy one.
Start with light noise reduction to tame surface noise. Then use a click and pop remover for the sharp ticks caused by scratches. Work in small amounts. Over-processing dulls the music and creates odd artifacts.
- Reduce hum with a notch filter at 50 Hz
- Apply gentle high-pass filtering below 30 Hz
- Normalise each track to a consistent level
- Check the result on headphones before exporting
The goal is audio fidelity, not a spotless file. Some character from the original record is fine.
Storage, Backup, and Legal Considerations
Store your digital files in at least two places. A common approach is one copy on your computer and one on an external drive kept somewhere else. Cloud storage adds a third layer for the files you cannot replace.
Name files clearly, for example Artist - Album - 01 - Track.wav, so they stay findable years from now.
On the legal side, copyright rules in Australia allow you to format-shift media you own for personal use, but they do not let you share or sell copies. Check the current Australian Copyright Council guidance on format shifting before making copies for anyone else. For a full breakdown of what you can and cannot do, the Attorney-General’s Department on copyright publishes the rules that apply.
If your collection also includes VHS tapes, film reels, or cassettes, the same preservation logic applies. Showbiz Video Productions handles all of these formats in one place.
Common Mistakes to Avoid
Most bad vinyl transfers come down to a handful of avoidable errors. Fix these and your recordings will sound dramatically better.
- Recording too hot. Peaks above 0 dB clip and cannot be repaired. Leave headroom.
- Skipping the clean. Dirty records add noise you cannot remove later.
- Using MP3 as your master. Always keep a lossless original.
- Ignoring the ground loop. A low hum ruins an otherwise clean recording.
- No backup. A single drive failure can wipe out weeks of work.
A common mistake is treating the transfer as a one-off job. In practice, old records and tapes keep degrading, so the sooner you convert them, the better the result. If you have a box of vinyl and other legacy media sitting in a cupboard, getting it digitised now protects it for future enjoyment.
Frequently Asked Questions
What equipment do I need to convert vinyl records to digital files?
You need a turntable, a phono preamplifier (if your turntable lacks a built-in one), an analog-to-digital converter or USB interface, and a computer with recording software. RCA cables connect the turntable to the preamp, and the preamp to the ADC. For the best results, use a quality cartridge and ensure proper grounding to avoid hum. Many modern USB turntables simplify this by combining components, but separate units often deliver better audio fidelity.
Is it better to record vinyl to WAV or MP3?
WAV is better for archival purposes because it captures uncompressed, lossless audio with full dynamic range. MP3 is a lossy format that discards some audio data to reduce file size, which can affect subtle vinyl nuances. For vinyl transfers, record to WAV first, then convert to MP3 if you need smaller files for portable devices. This preserves the original quality and gives you flexibility for future formats.
How do I clean my vinyl records before digitising them?
Use a carbon fibre brush to remove loose dust, then apply a vinyl cleaning solution with a microfibre cloth or a record cleaning machine for deeper grime. Always clean along the grooves, not across them. For stubborn dirt, a vacuum-based cleaner works well. Let records dry completely before playing. Clean records reduce surface noise and clicks, resulting in a cleaner digital transfer.
Can I convert vinyl to digital without a computer?
Yes, some standalone digital recorders and USB turntables with SD card slots allow direct recording to a memory card. However, these options often lack advanced editing features like track splitting and audio restoration. For the highest quality and flexibility, using a computer with dedicated software remains the preferred method. If you have a large collection, professional services can handle the entire process for you.
Vinyl and other legacy formats do not last forever. Every play wears the groove a little more, and time is not on your side. If you would rather not risk your collection, Showbiz Video Productions offers professional-grade conversion with over 20 years of experience, same-day turnaround in most cases, and transparent pricing. Get a quote today and turn those records into files you can keep for good.