
Table of Contents
- Assess Your Hi8 Tapes and Equipment
- Play Hi8 Tapes Without a Camcorder
- Video8 and Hi8 Tape Compatibility
- Transfer Hi8 Tapes to Digital Files
- How to Store Camcorder Tapes Safely
- Preserve Your Digital Files for the Long Term
- Frequently Asked Questions
Last Updated: October 12, 2026
Assess Your Hi8 Tapes and Equipment
Old Hi8 camcorder tapes hold irreplaceable family memories. But before you can watch them again, you need to understand what you’re working with. The first step is checking your tapes and identifying what playback equipment you already own.
Check tape condition and format
Hi8 tapes come in different formats, and knowing which one you have matters. Hi8 is the higher-quality version of Video8, with better resolution. Digital8 is the newest format in this family, offering digital recording on 8mm tape.
Look at your tapes closely. Check for:
- Physical damage like cracks, warping, or mould
- Tape spools that are loose or stuck
- Labels that tell you the format (Hi8, Video8, or Digital8)
- Recording dates that help you prioritise which tapes matter most
Tapes stored in hot, humid, or damp conditions degrade faster. If your tapes spent years in an attic or garage, the magnetic coating may have deteriorated.
Identify what playback equipment you have
Do you still own the original Hi8 camcorder? If you do, you’re in luck. The camcorder itself is the most reliable way to play your tapes. Check if it powers on and if the tape mechanism works smoothly.
If your camcorder is gone, note what other equipment you have:
- A Hi8 VCR player (less common but still useful)
- A standard television with AV inputs
- A computer with USB ports
- Cables and adapters gathering dust
Knowing what you already own saves money and helps you choose the fastest path forward.
Play Hi8 Tapes Without a Camcorder
Not everyone still has their original camcorder. If yours is long gone, you have other options for playback.
Using a compatible Hi8 VCR player
A Hi8 VCR player is a standalone device designed specifically for playing 8mm-format tapes. These machines are harder to find than they were 10 years ago, but they still exist. You can sometimes locate them on second-hand marketplaces, though prices vary widely.
If you find a working Hi8 VCR player, it’s straightforward:
- Insert your tape into the player
- Connect the player to your television using AV cables (red, white, and yellow connectors)
- Switch your TV to the correct input channel
- Press play
The advantage is simplicity, no computer required, no software to learn. If you want to preserve the footage, you’ll need to record it as it plays or move to a transfer service.
Connecting a camcorder to your television
If you still own your Hi8 camcorder, connecting it to a TV is the easiest playback method. Most camcorders have AV output ports on the back or side. These ports use three colour-coded connectors: yellow for video, red for right-channel audio, and white for left-channel audio.
To connect your camcorder to your television:
- Locate the AV output ports on your camcorder
- Plug the matching AV cables into those ports
- Connect the other end to your TV’s AV input ports (usually on the back)
- Turn on both the camcorder and the TV
- Switch your TV to the AV input channel (not HDMI)
- Insert your Hi8 tape and press play on the camcorder
This method works even if your camcorder hasn’t been used in years. The tape mechanism may need a gentle cleaning if it’s sticky, but most camcorders recover quickly once they’re powered up again.
Video8 and Hi8 Tape Compatibility
Understanding the relationship between Video8, Hi8, and Digital8 helps you avoid wasted effort.
Video8 is the oldest format. Hi8 improved the resolution and picture quality.
The compatibility question is simple: can a Hi8 camcorder play Video8 tapes? Yes, it can. Most Hi8 camcorders are backward-compatible with Video8.
This matters when you’re choosing a playback method. If you have a mix of Video8 and Hi8 tapes, you need equipment that handles both. A Hi8 camcorder or a Digital8 camcorder will work.
Transfer Hi8 Tapes to Digital Files
Playing your tapes once is nice. Preserving them permanently is essential. Transfer Hi8 tapes to digital files and you can watch them on any device, share them with family, and back them up safely.
DIY capture setup and process
You can capture your tapes yourself using a few affordable pieces of equipment. This approach takes time and patience, but it keeps costs low.
What you’ll need:
- Your Hi8 camcorder or a Hi8 VCR player
- AV cables (usually included with the camcorder or player)
- A video capture device (USB adapter that converts analogue video to digital)
- A computer with USB ports and free storage space
- Capture software (many capture devices include free software)
The process works like this:
- Connect your camcorder or Hi8 player to the capture device using AV cables
- Connect the capture device to your computer via USB
- Open the capture software on your computer
- Insert your Hi8 tape and press play on the camcorder or player
- Click record in the software to start capturing
- Let the entire tape play through (don’t stop and start)
- Save the digital file to your computer
- Repeat for each tape
The biggest challenge is patience. A 120-minute tape takes 120 minutes to capture in real time. You can’t speed it up. If you have dozens of tapes, this becomes a weekend project.
Quality depends on your capture device. Budget USB capture adapters produce decent results for home videos. Professional-grade equipment costs more but delivers noticeably better quality.
Do not leave the computer unattended during capture. If the software crashes or the USB connection drops, you’ll lose the entire recording. Stay nearby and monitor the process.
Professional digitisation services
Professional services handle the heavy lifting for you. A service like Showbiz Video Productions can capture your tapes, handle damaged media, and deliver finished files quickly.
The advantages of professional transfer are real:
- Expert technicians know how to handle fragile or damaged tapes safely
- Professional-grade equipment captures higher quality than most consumer devices
- You don’t have to sit and watch tapes play for hours
- Damaged tapes that fail on consumer equipment often recover under professional conditions
- Fast turnaround
The trade-off is cost. For a small collection, DIY is cheaper. For larger collections or damaged tapes, professional service becomes worth the investment.
If you have just a few tapes in good condition, DIY capture is practical. If you have more than 20 tapes, or if any tapes show signs of damage or mould, professional digitisation saves time and protects your memories.
Choosing your output format
Once your tapes are captured, you’ll need to choose a file format. The format affects file size, compatibility, and how easily you can edit or share the video.
Common output formats include:
- MP4: The most universal format. Plays on any device. Good compression means smaller files. Best choice for sharing with family or uploading to cloud storage.
- MOV: Apple’s format. Works well on Mac computers and iPhones. Larger files than MP4 but slightly better quality.
- AVI: Older format. Larger files. Less commonly used today but still compatible with most video players.
- MKV: Modern container format. Excellent quality and compression. Less universal support on older devices.
For most people, MP4 is the safest choice. It plays on phones, tablets, computers, and smart TVs without conversion.
File size matters too. A 2-hour Hi8 tape typically becomes a 1-3 GB MP4 file, depending on quality settings. Make sure you have enough storage space on your computer and a backup plan.
How to Store Camcorder Tapes Safely
Your tapes survived this long because they were stored reasonably well. But they’re still fragile. Proper storage now prevents damage and extends their lifespan before you digitise them.
Proper storage conditions and handling
Hi8 camcorder tapes are magnetic media. Heat, humidity, and physical damage all shorten their life.
Store your tapes in a cool, dry place:
- Room temperature between 15-25°C
- Humidity between 30-50%
- Away from direct sunlight
- Away from magnetic fields (keep them far from speakers, televisions, and motors)
Attics and basements are risky. Attics get too hot. Basements get damp. A bedroom closet or a cupboard in your lounge is far safer.
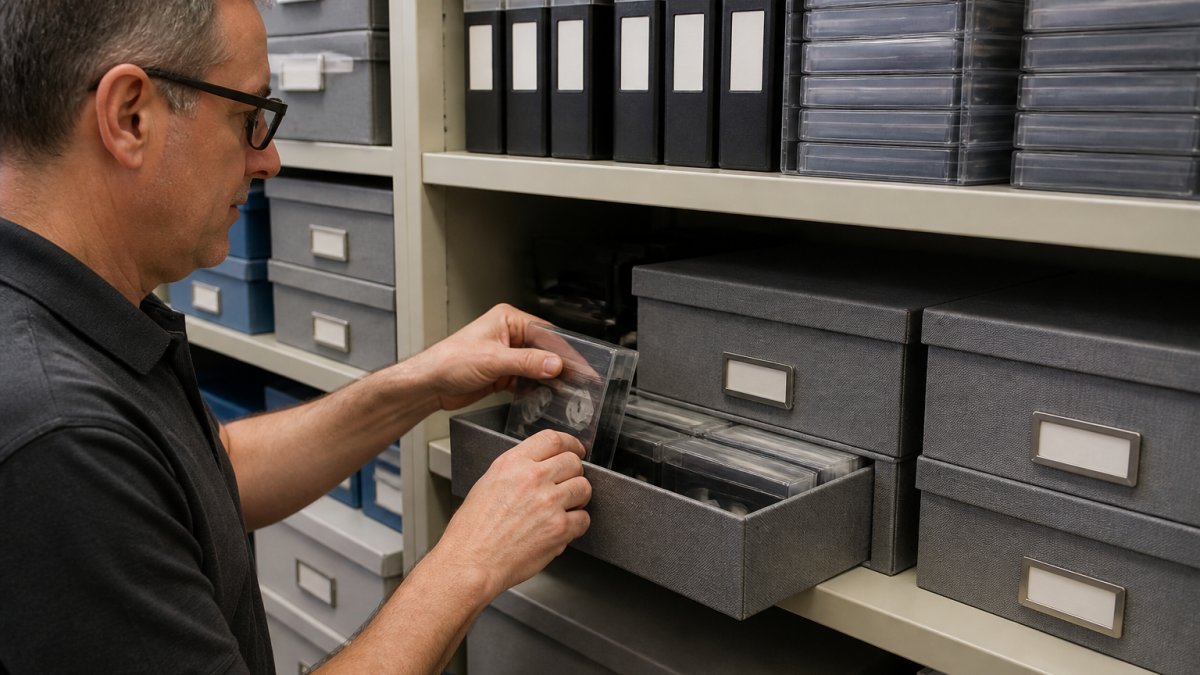
Handle your tapes with care:
- Always rewind tapes fully before storing them
- Store tapes upright, not flat
- Keep tapes in their original cases or archival boxes
- Label each tape with the date and contents (use a permanent marker on the case, never on the tape itself)
- Never touch the exposed tape inside the cassette
If a tape has been stored poorly for years, let it sit at room temperature for 24 hours before playing it (Care, Handling, and Storage of Audio Visual Materials – Collections Care).
Identifying and repairing damaged tapes
Damaged tapes often still contain recoverable footage. The damage might be visible, or it might only show up when you try to play the tape.
Common damage signs include:
- Visible cracks or warping in the plastic case
- Mould or discolouration on the tape itself
- A musty smell when you open the case
- Tape that’s loose inside the cassette or spilling out
- Squealing or grinding sounds when the tape plays
Minor damage sometimes responds to simple fixes:
- If the tape is loose inside the cassette, carefully rewind it by hand using a pencil in the spool hole
- If the case is cracked but the tape is fine, transfer the tape to a new archival case
- If the tape is stuck, do not force it, leave it at room temperature for several hours before trying again
Serious damage like mould, severe warping, or broken tape requires professional help. Showbiz Video Productions has the equipment and expertise to recover footage from tapes that won’t play in consumer equipment. Even tapes that seem completely dead often yield results under professional conditions.
Store your tapes upright in a cool, dry place. Handle them gently. If a tape shows signs of damage, digitise it soon, waiting makes recovery harder.
Preserve Your Digital Files for the Long Term
Once your tapes are converted to digital files, your work isn’t finished. Digital files need protection too.
A single copy of your files is risky. Hard drives fail. Computers get stolen or damaged.
Follow the 3-2-1 backup rule:
- Keep 3 copies of your files
- Store them on 2 different types of media (such as an external hard drive and cloud storage)
- Keep 1 copy in a different physical location (such as a friend’s house or a safe deposit box)
External hard drives are affordable and reliable.
Check your backups once a year. Open a few files to make sure they still play.
Your Hi8 tapes are a window into family history.
At Showbiz Video Productions, we’ve been preserving family memories for over 20 years.
Frequently Asked Questions
How do I transfer old Hi8 tapes to digital?
You have two main options: DIY capture using a Hi8 camcorder or compatible player connected to a video capture device on your computer, or professional digitisation services. For DIY, connect your playback device to a capture card via AV cables, use video editing software to record the output, and save as MP4 or MOV. Professional services handle the entire process and often deliver higher quality results. The choice depends on your equipment, technical comfort, and budget.
Can you play Hi8 tapes without a camcorder?
Yes. You can use a standalone Hi8 VCR player if you can find one, or connect a compatible camcorder to your television using AV cables. Some Hi8 camcorders allow playback-only mode without recording. If you don’t own either, professional digitisation services can play your tapes using their equipment and convert them to digital files, which is often the most practical option for older or fragile tapes.
What is the difference between Hi8, Video8, and Digital8 tapes?
Video8 was the original 8mm format introduced in the 1980s. Hi8 improved video quality with better resolution and colour reproduction, released in 1989. Digital8, launched in 1999, recorded in digital format but used the same physical tape size. All three use similar-sized cassettes, but playback devices must match the format. A Hi8 camcorder cannot play Digital8 tapes, and Video8 players cannot play Hi8 tapes. Check your tape labels to identify which format you have.
How should I store old Hi8 camcorder tapes?
Store tapes upright in archival-quality plastic cases away from heat, humidity, and direct sunlight. Keep them in a cool, dry place between 16-21°C with 30-40% relative humidity. Rewind tapes fully before storage to reduce stress on the magnetic coating. Label each tape clearly with content and date. Avoid stacking tapes flat, and store away from magnets and electronic devices. Check tapes periodically for signs of mould or deterioration. If tapes show damage, prioritise digitisation immediately to preserve the content.